Advertisement

The siege of Ala Mhigo is the final dungeon in the main scenario storyline of Final Fantasy XIV: Stormblood.

Story
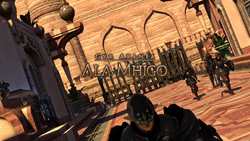
FFXIV Ala Mhigo Duty 01
Ala Mhigo opening cinematic.

Liberty or death! Now begins the battle for the future of a nation. Together with the brave men and women of the Eorzean Alliance and the Resistance, you and your fellow adventurers must enter the city and make for the castle where Zenos Galvus resides, and put an end to his reign of terror.In-game description

Objectives

  1. Eliminate the imperials: 0/1
  2. Defeat the magitek scorpion: 0/1
  3. Eliminate all obstacles: 0/1
  4. Slay Aulus mal Asina: 0/1
  5. Arrive in the Hall of the Griffin: 0/1
  6. Defeat Zenos yae Galvus: 0/1

Progression

Upon opening a breach on the gates, the party enters into Ala Mhigo to liberate it from the Imperials' grasp. The party is greeted by soldiers and predators, with barricades that a handful of soldiers can vault over as reinforcements. Upon defeating them, a Maelstrom soldier breaks the barricade, allowing the party to progress.

Upon breaching the second barricade the party faces the first boss, Magitek Scorpion, which resembles the Guard Scorpion from Final Fantasy VII. The boss can deal party wide damage with its tail laser, which covers its front and rear for a few seconds. Its _target Search slowly follows a party member before locking on, which will leave a fire puddle that burns the player with a DoT when stepped upon. The players should bait the _target search to a safe location, wait for it to lock on, and dodge the strike.

After defeating the boss, more Imperials will appear. When going into the open through the plaza, the party is _targeted with mortars from afar that can be avoided. An allied soldier will shoot towards the gate after all enemies are defeated, allowing the party to progress.

The player is soon greeted by the second boss, Aulus mal Asina, the Garlean scientist. Sitting on a hovering chair, he has a party wide damage called Mana Burst. He orders fire in a large AoE, and sprays lasers in a super wide donut AoE. He shares his findings and separates the player's soul from their body. Knocked back to the edge, the player must make their way back to their body, guided by a tether, while avoiding the hand and the lasers; although they are not particularly harmful, they will slow the player down. Upon reaching their body, the player will wake up, take out the hands, and the fight continues normally. The boss will repeat the same mechanics, although the next order to fire will be mixed, and he adds a spread AoE along with the lasers. He will not, however, repeat the out of body mechanic.

Upon defeating Aulus, the party proceeds into the palace proper where the path is barricaded with breakable Magitek Laserfields. The player is be bombarded by Thaumaturges as they defeat the Imperials and the lasers nearby. The player soon meets Slashers and a Hexadrome, and two Magitek Colossi who will use heavily damaging AoE attacks. Once they're down, the door to the throne opens, and the player will face Zenos Galvus in a final rematch.

Zenos unleashes himself as soon as the fight starts, and prepares either Art of the Storm or Art of the Swell. Swell knocks the player back a set distance from the boss, while Storm deals heavy damage to those close to him. The player should stay close to the boss for Swell, and stay away from the boss in Swell. When he says "Kill.", he prepares a triple swipe of his sword to the Tank and can be considered a Tankbuster. Later on, he will prepare Art of the Sword, which the party should spread out and not stay too close to the boss or risk overlapping. When Zenos says "Let this moment last forever!", he spawns four images of him, and starts to prepare Vein Splitter, a large AoE around him. The party should run to the center as his images start casting the same spell simultaneously. Zenos goes to near the edge of the arena, and one random party member will be tethered for Lightless Spark, a cleave attack that can be baited away by directing the tether outwards. He will occasionally cast Concentrativity, which deals unavoidable party wide damage. Once his HP reaches around 15%, Zenos will say "Show me your all" and throw his swords to the ground with the adds Ame-no-Habakiri, The Swell, and The Storm.

The player should defeat these adds quickly, while also dealing with the combined Arts from Zenos's images (either Swell & Storm or Storm & Sword). He will build up aether as long as the adds are alive, and will hit harder the longer it takes. Once the adds are down, he will say "Have you the strength?", as he prepares to heavily damage the whole party. Zenos is _targettable again and will continuously cast Concentrativity until he's down, and the duty is complete.

Zenos will retreat, luring the party towards the Royal Menagerie.

Enemies

  • 12th Legion Centurion
  • 12th Legion Laquearius
  • 12th Legion Hoplomachus
  • 12th Legion Predator
  • 12th Legion Eques
  • 12th Legion Signifer
  • 12th Legion Roader
  • Magitek Scorpion
  • 12th Legion Avenger
  • 12th Legion Canis Pugnax
  • 12th Legion Rearguard
  • Aulus mal Asina
  • Magitek Laserfield
  • 12th Legion Hexadrone
  • 12th Legion Slasher
  • 12th Legion Colossus
  • Zenos yae Galvus
  • Ame-no-Habikiri
  • The Swell
  • The Storm


Maps

Community content is available under CC-BY-SA unless otherwise noted.
  NODES
admin 1
chat 1
COMMUNITY 7
Note 4
Project 1