2. Replace map pictures to be compliant with the #Video Walkthrough below.
3. Check the table's numbers consistency with the video walkthrough.
4. Go over the detailed guide's numbers to be compliant with the video walkthrough.
This article is about Hidden Packages in GTA III. For Hidden Packages in other GTA games, see Hidden Packages.
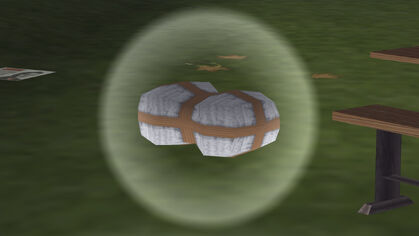
Grand Theft Auto III features 100 hidden packages scattered across its three islands. They take the appearance of a white bale sealed with brown adhesive tape. Collecting all 100 is essential for 100% completion. This page provides detailed locations for each package.
Portland Island
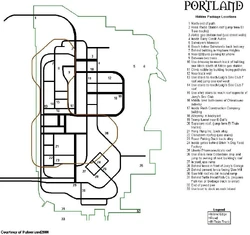
Portland Island Locations
| # | Image | Location description |
|---|---|---|
| 1 | 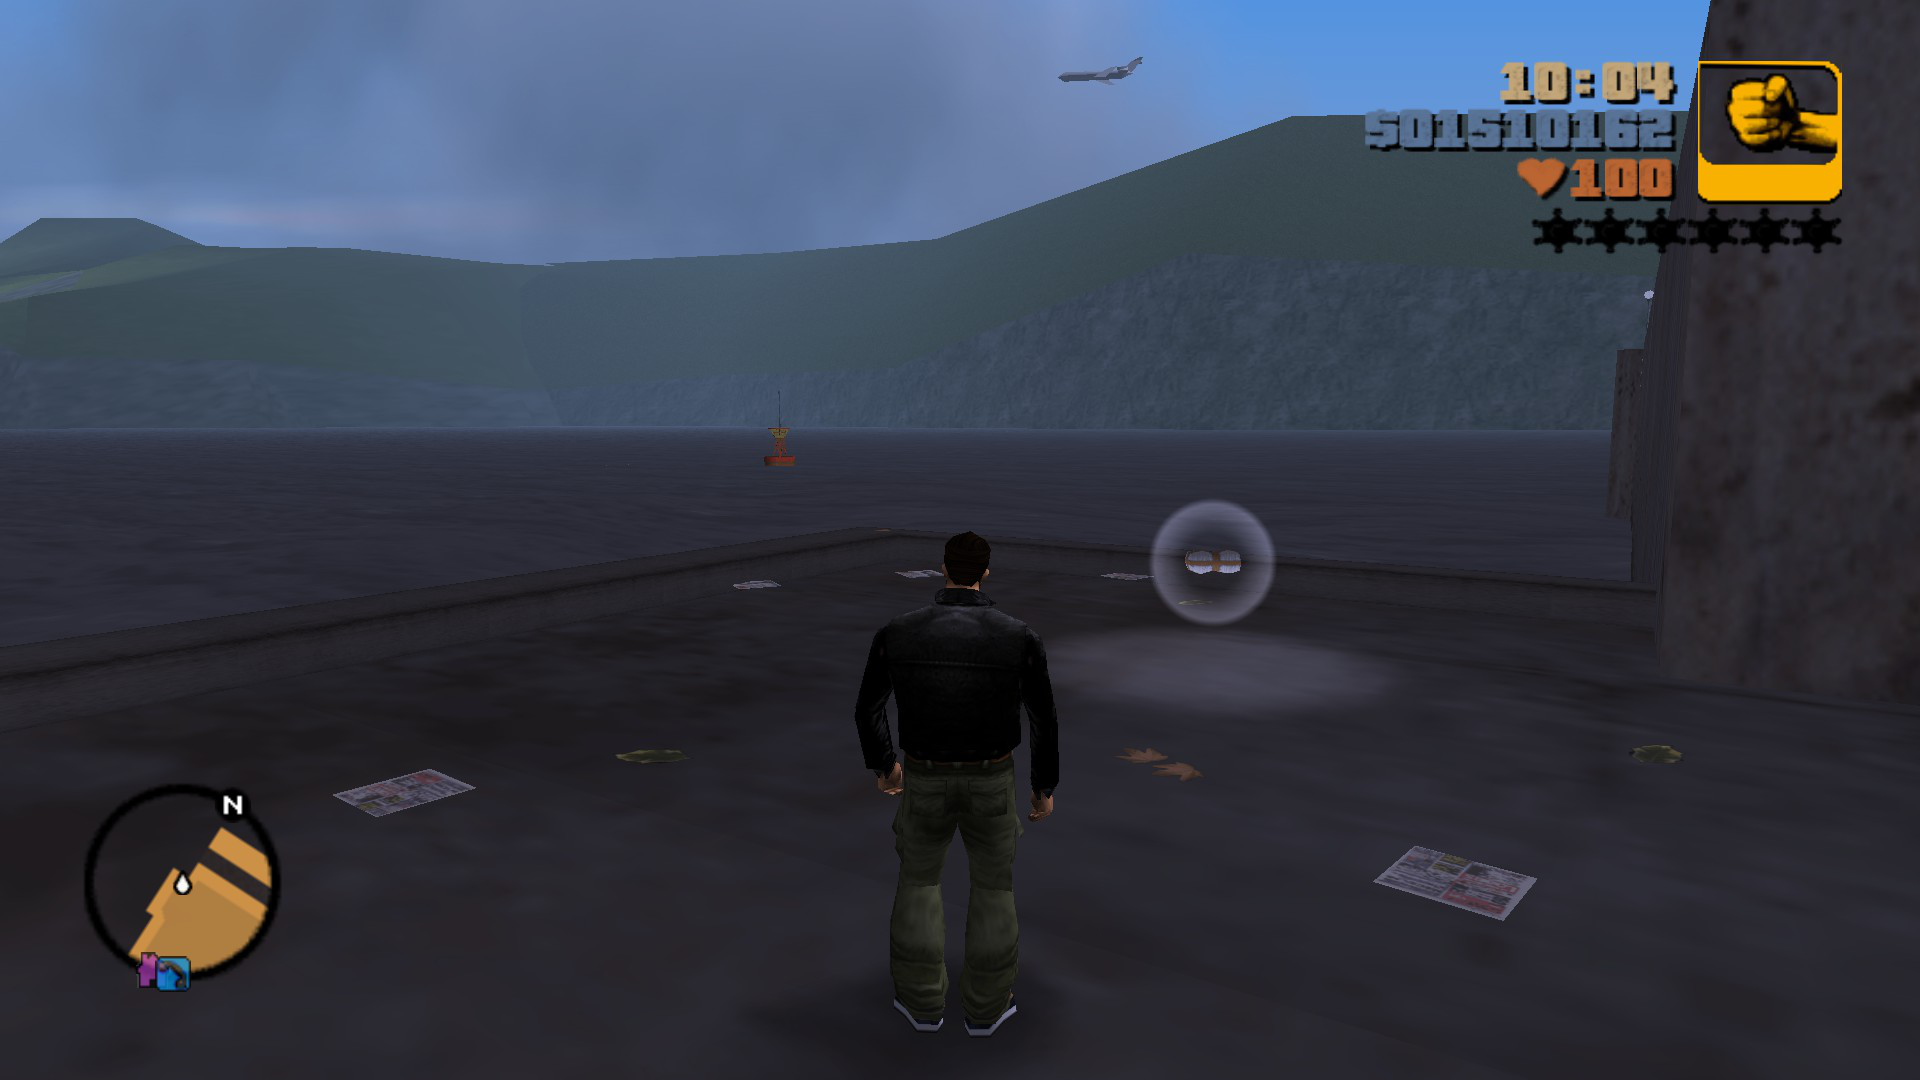 |
Drive north to the end of the path on Harwood. |
| 2 | 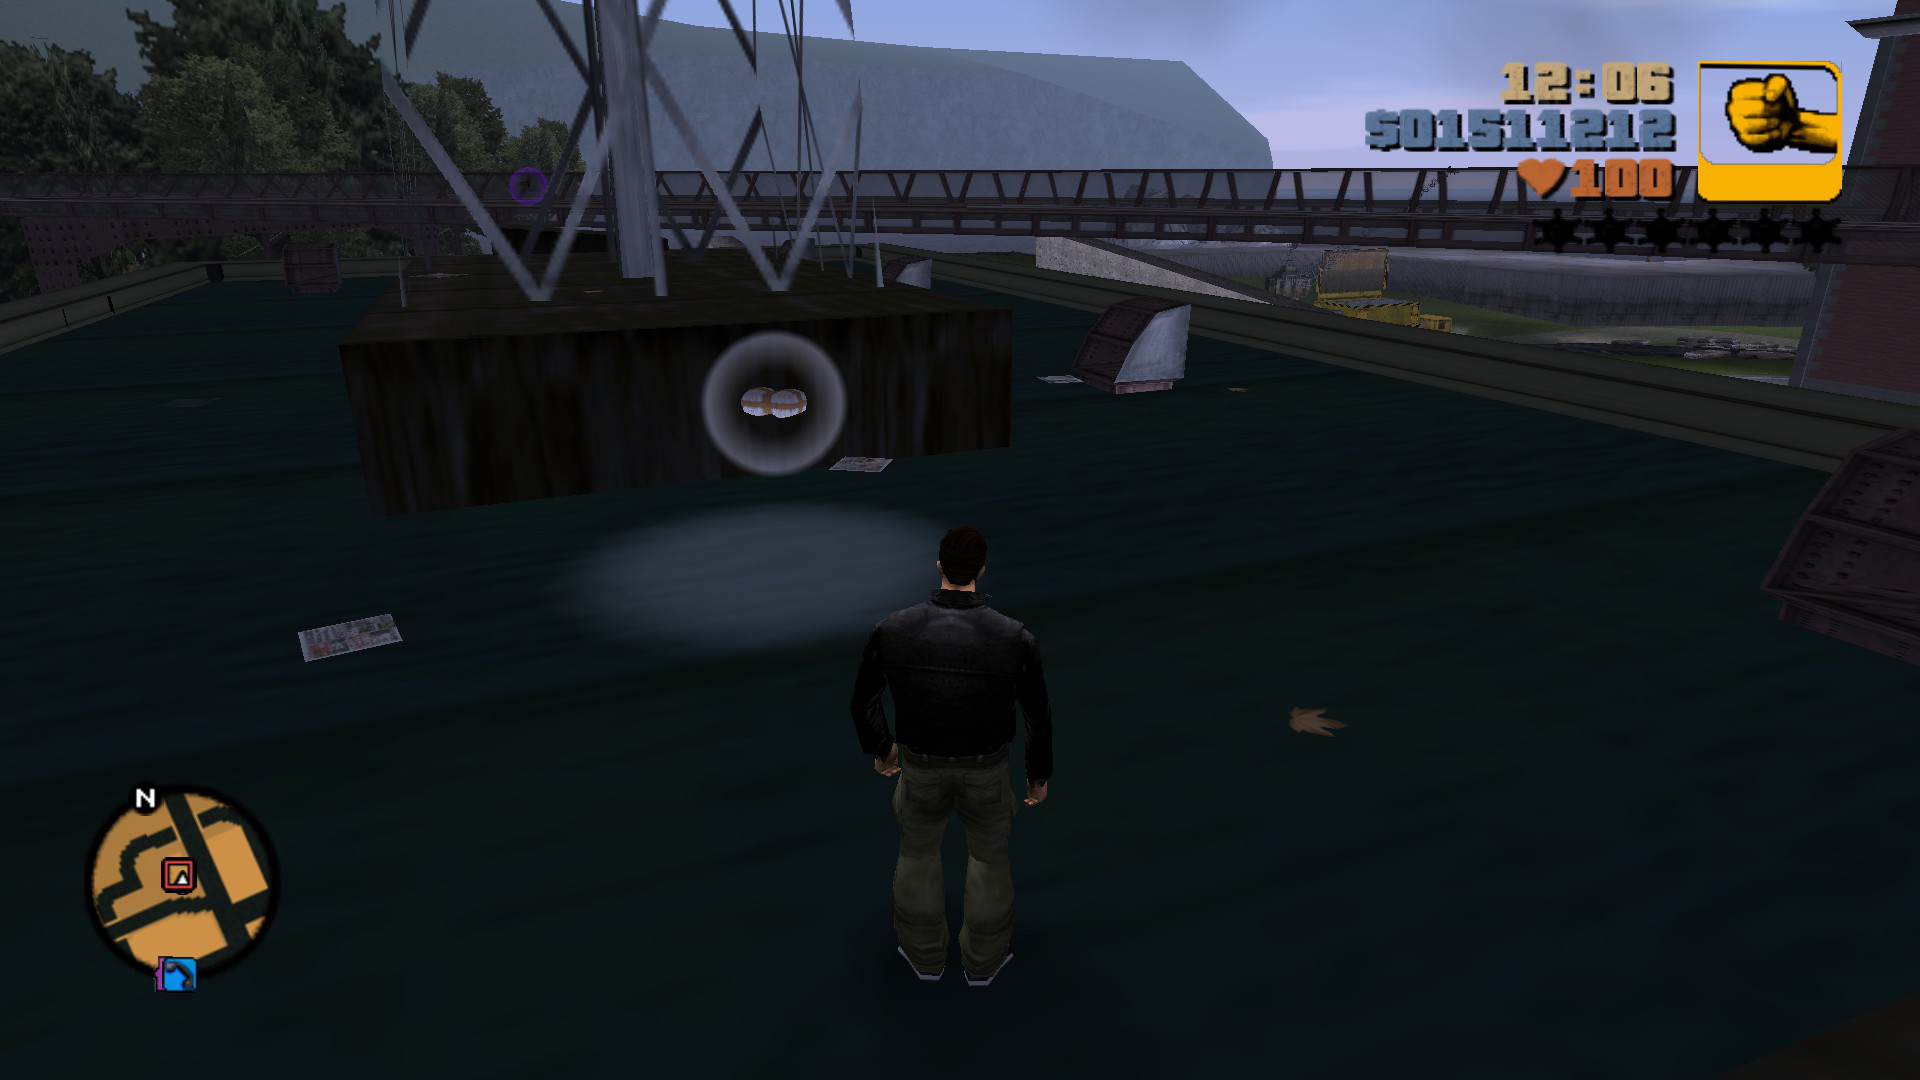 |
Harwood, roof of Head Radio Headquarters. Reach there by jumping off the tracks. |
| 3 |  |
Saint Mark's, on top of the AMCo. gas station. |
| 4 |  |
St. Mark's, inside Easy Credit Autos. |
| 5 |  |
Portland Beach, at Salvatore's Mansion. |
| 6 |  |
On a ledge below Salvatore's Mansion. |
| 7 |  |
Behind the building of Hepburn Heights Towers. |
| 8 |  |
In parking lot near El Burro's phone in Hepburn Heights. |
| 9 |  |
Between trees in Hepburn Heights. |
| 10 |  |
One block south from AMCo. gas station in a small parking lot in St. Mark's. |
| 11 |  |
Building facing large potholes in St. Mark's. |
| 12 |  |
Park in St. Mark's. |
| 13 |  |
Roof of building next to Luigi's Sex Club 7 in Red Light District. |
| 14 |  |
Roof of Luigi's Sex Club 7. |
| 15 |  |
Roof opposite Luigi's Sex Club. |
| 16 |  |
Subway in Chinatown in the bathrooms (accessible after Last Requests). |
| 17 |  |
Rush Construction Company in Red Light District. |
| 18 |  |
Long alleyway in St. Mark's. |
| 19 |  |
Harbour Tunnel in St. Mark's. |
| 20 |  |
Roof of Supa Save! in Portland View. |
| 21 |  |
Alley behind Hong Hung Inc. in Chinatown. |
| 22 |  |
Chinatown southwestern building roof. |
| 23 |  |
Alley behind Roast Peking Duck in Chinatown. |
| 24 |  |
Inside the gates of the Bitch'n' Dog Food Factory in Trenton. |
| 25 |  |
Roof of Liberty Pharmaceuticals in Trenton. |
| 26 |  |
Roof of Portland Harbor building. |
| 27 |  |
In a yard in Trenton. |
| 28 |  |
Front of Joey Leone's Garage in Trenton. |
| 29 | 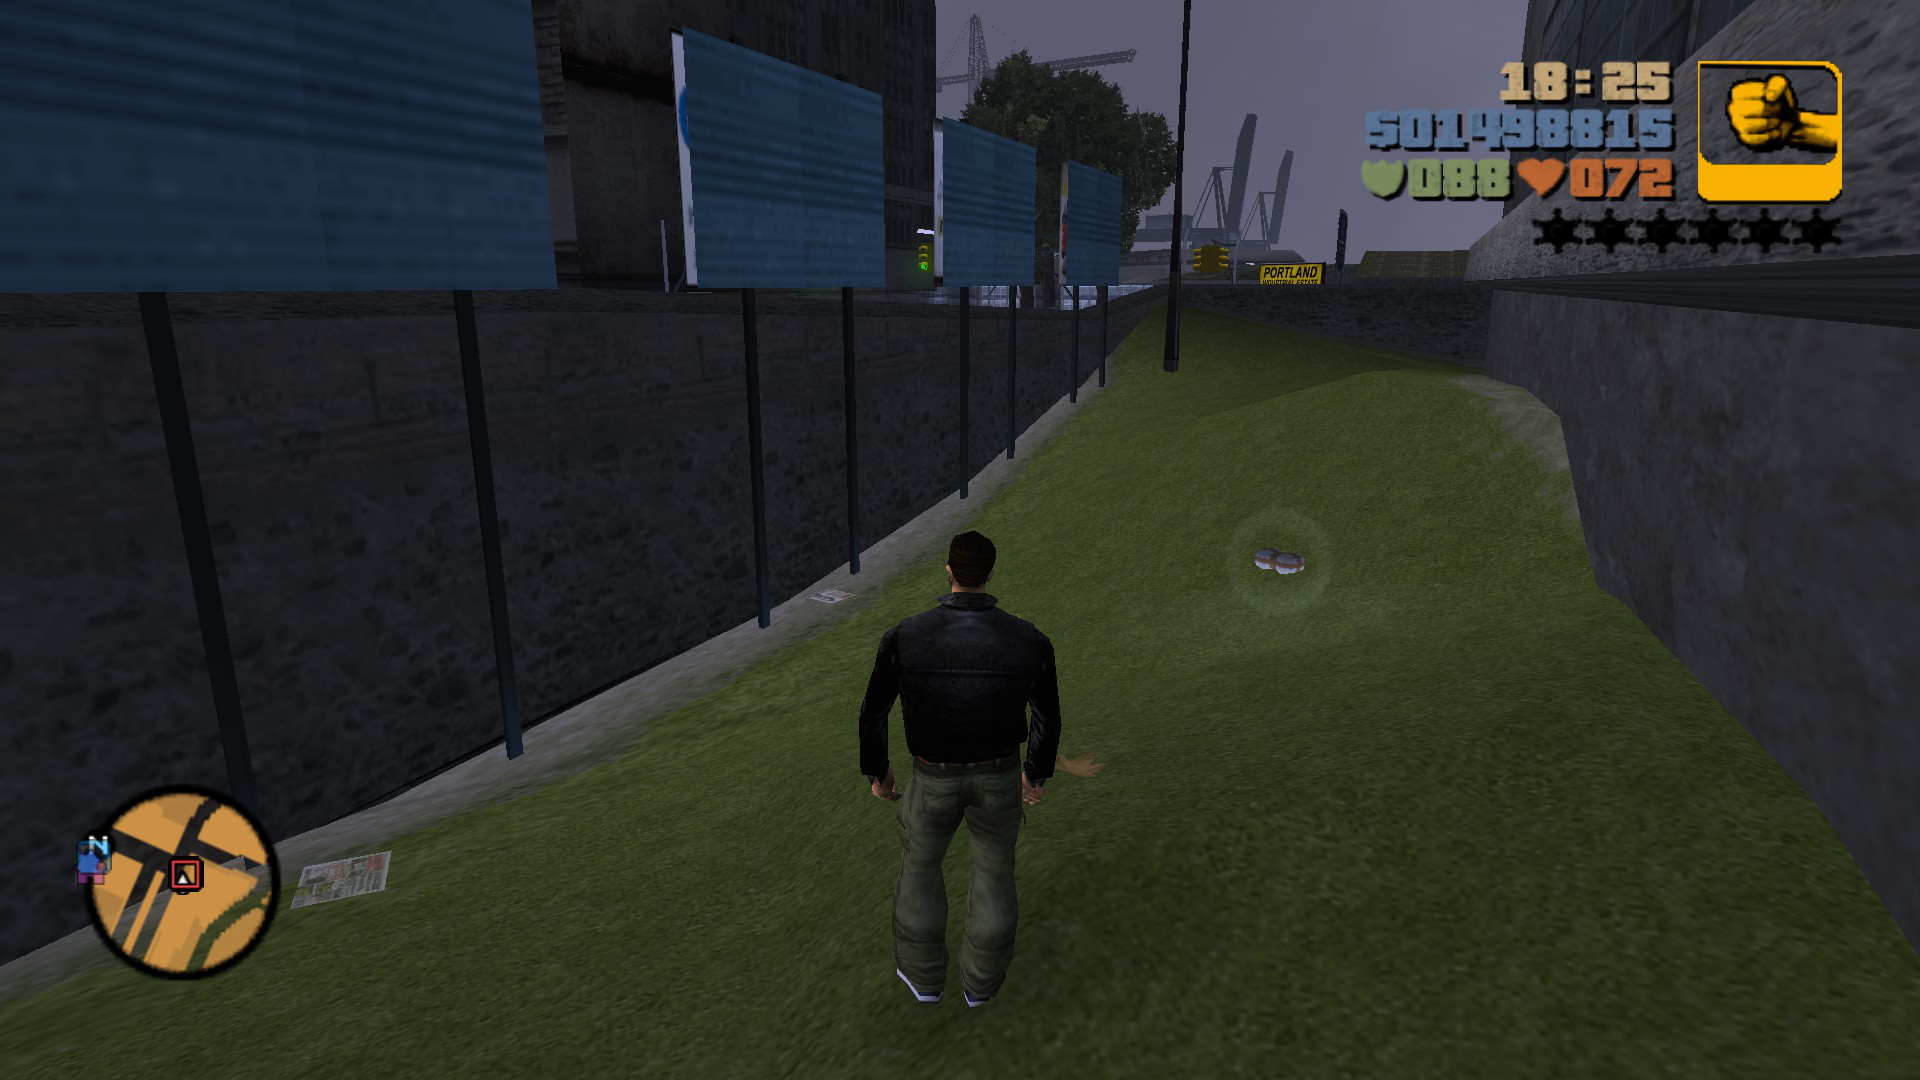 |
Power Plant in Callahan Point. |
| 30 |  |
Roof of sawmill in Trenton. |
| 31 |  |
Behind Turtle Head Fishing Co. in Callahan Point. |
| 32 |  |
At the end of the pier in Atlantic Quays. |
| 33 |  |
Island just south of Portland (accessible by boat). |
Portland Island Detailed Locations Guide
1. From Claude's hideout, go left, cross the carriage way (highway) and the grass verge to get to the shoreside. Go right and all the way to the end.
2. From Claude's hideout, go left, cross the carriage way and look for the stairs to the elevated railway on the right. Jump onto the tracks and go right along the raised central section (to avoid getting hit by the trains.) After a LONG trek jump onto the roof of the Head Radio building (easily identified by the large radio mast) and pick up the package (along with the flame thrower.)
The next group of packages are in the Saint Mark's area. Leave Claude's hideout and make a right and another right. Go left at the lights and then right through the parking lot with the phones. Go left and follow the road around, go left and then right to spot the AMCo. gas station across the road from the fire station.
3. Jump up onto the walls at the entrance to the gas station and walk along and around the walls until you can jump onto a roof. Take a running jump onto the next roof the pick up the package. There is some health in the fore court if you need it after taking these tumbles.
4. From the gas station circle around the back to find the Easy Credits Auto showroom. Use a car to break through the glass windows to pick up another package and a tasty sports car.
10. From here make a quick left and right to the building immediately on your left. Go round the back to the left to find another package.
11. From this buildings entrance go right, right, and right again until you see a building with scaffolding and piles of earth. Hop up the left hand pile to discover the package.
12. From outside this building go right and follow the road as it curves around to the top of a hill. Pull into the small park on the right hand side. Go up and over the sloping roof to find the next package. If you continue over the next roof you will find a shotgun.
18. From where you entered the park right and just after 2 major roads (marked on the map) you will see a long narrow alley through an archway. Go down here and take the gap on the right to locate the uzi and another package.
Now we are jumping back to 5 and 6 on the list.
5. From the park where you found package 12, cross the road to find the entrance to the godfather's mansion. Go along the drive and then up the steps on the right of the garages to the verandah. Follow this around to the left and you will come to another package.
6. As you go back down the steps from the veranda, turn right and descend the steep slope (carefully!) to the beach. Go right along the sand and then up to a small ledge next to the big hole in the cliffs for your 10th package. Now you are the proud owner of the pistol.
7, 8, and 9 on the list are back in Hepburn Heights near your hideout.
7. From your hideout go right and past the first turning. Then go right into the grounds of the apartment block. Turn left at the plank ramp and go right around the back of the building.
8. Now if you are feeling daring rev up your car and take the jump to land in the parking lot next to the phones. Jump into the little island to find the next package.
9. Then go across the lot and over the road into the trees on the slope. Hidden amongst the foliage is another package.
13, 14 and 15 are in the same small area of the red light district. Use the steps around the back of Luigi's to find one of them on the roof. Then jump across next to the billboard and walk along right to the end of the next roof for another one. Cross the road from Luigi's and go round to the left of Woody's to find an alley and another set of steps. Climb these to get to the final package of this group.
17. From in front of Luigi's go ahead and then make a left. To the left of the large T junction is an empty building with glass windows you can smash to get inside and pick up the next package.
16. Directly opposite the Rush Construction building is the entrance to the subway in China Town. You will need to complete all the missions for Portland before this opens up and you can go down to get the package in here.
We stay in Chinatown for the next 3 packages (21, 22, 23)
I found that I got lost very easily in this area so my directions may sound a little strange but they all start from the hideout (a nice fixed point.)
From the hideout take a left and then count the turnings off to the left and take number 6. Go left again and park outside the Hong Hung Inc building. Go down the alley with the bollards. For those of you unfamiliar with the term 'bollard' this is a short concrete post used to prevent vehicles entering an alleyway or other area.
From the hideout take a left and then count the turnings off to the left and take number 7. Follow the road around a curve and park next to the Roast Peking Duck. There is a package in the alleyway next to this building.
Finally from the hideout take a left and then count the turnings off to the left and take number 6. Immediately on the right is a yard with some steps. Go up the steps and onto the roof where there is the final package of this trio.

Now you have 20 packages and the Uzi.
The next group of packages are in the delightful industrial area of Trenton. Make your way to the Easy Credit Auto showroom and go to the left to find an abandoned tunnel screened by shrubbery. Mow down the tramps in the middle of the tunnel and pick up the package they are surrounding (19)
The next package is on the roof of the Supa Save store at the end of the tunnel (20) Climb the steps at the back of the store and go right and up onto the elevated railway tracks. A short way along the tracks you can jump off to the right onto the roof and pick up the package.
Retrace your steps to the elevated railway tracks but this time carry on along the tracks past the Supa Save store until you see the Liberty Pharmaceuticals factory to your left (it has two large chimneys to identify it.) You will see a girder projecting towards the roof. Position yourself on the girder and take a running jump off it onto the roof of the factory. The roof is extensive so go towards the chimneys and then right to find the next package (25) and other goodies.
Look across the street to see the gates of the Bitch'n' Dog Food factory. Jump down, go through the gates and around the left side of the building to find package 24.
Now turn right outside the gates and cross the road to get to the front of Joey's garage. Cross the road again and jump over the low wall and go right to discover package 28.
From the yard of this building face the Liberty Pharmaceuticals sign and go right, crossing the road until you see the Bus Company depot on your right. Jump on the low wall around the depot and go along to the end and jump over the next wall into the yard of the Saw Mill.
Climb the sawdust heap and cross several sloping roofs until finally you go up a blue slope and locate the package at the edge of the final roof (30)
Look across the street to see the Power Plant. Jump down and go around left to find the entrance. Go around the side of the building to pick up yet another package (29)
From where you picked up this package, jump down to the entrance to Callahan Bridge. Go forward and take the first right. Go through the entrance to your right, along to the end, go left at the ramp and finally find package 27. This set of directions seems to be causing a few problems. When you jump down off the Power Plant wall you should have the Power Plant wall at your back, the bridge on your left and be facing towards China Town. Walk forward and take the first turning you come to on your right. Then go right through the first entrance you come to.
For the next package you will need to steal a triad fish van. They are easily identified by the Belly Up slogan on the side. There are always plenty around in China Town. Drive towards the Callahan Bridge and the Power Plant, go left, right ad right again. Look for the dirt track through the trees on the left and follow it to the gates of the fish company. The gates will open for you and drive around to the left and behind the building to get the package (31) Warning! The Triads in the yard will NOT be friendly so don't stay to chat with them.
Leave the dirt road and turn right and right again. Go along to the end of this road and turn right by the large green building. Go all the way along to the end of the pier to get package 32.

Now you have 30 packages and grenades!
Go back along the pier and turn right and right again. Then two more right turns to enter the main gates of Portland docks. Go right and down beside the ship. Up the stairs and onto the roof of the large building and then jump across to the awning of the other building to get package 26. I was only able to make this jump by forcing a small, powerful sports car up the stairs, onto the roof and jumping it across the gap. However a kind soul pointed out that there is an adrenalin pill nearby which will give you the strength the make the jump.
The last 2 packages must wait until you have finished all the missions on Portland. As you leave the island by boat take time to land at the small rocky island that is near the jetty where you start your voyage. Package 33 is shipwrecked there.
Once you get to Staunton and have found your new hideout you will need to take the newly opened subway to China Town to pick up package 16.
From the hideout take a right and go along to the end of the road. Bear left and right at the lights and then go along to the end. The subway entrance in on the right next to some billboards.
You can take the bridge if you like but showing your face in China Town will attract unwanted attention from the triads.
Check your stats to make sure you have a total of 33 packages!
Staunton Island
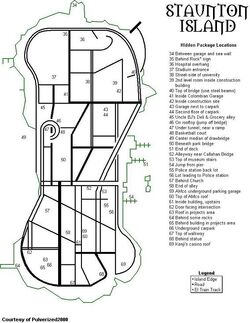
Staunton Island Locations
| # | Image | Location description |
|---|---|---|
| 34 |  |
Army Surplus store. |
| 35 |  |
North of the Coliseum behind Rockstar billboards. |
| 36 |  |
Top of Carson General Hospital. |
| 37 |  |
Liberty City Memorial Stadium. |
| 38 |  |
East side of Liberty City Community College. |
| 39 |  |
Construction site. |
| 40 |  |
On top of small bridge where there are girders. |
| 41 |  |
In Colombian Garage. |
| 42 |  |
Construction site. |
| 43 |  |
Connecting alley to 8-Ball's. |
| 44 |  |
Car park. |
| 45 |  |
Alley south of Coliseum. |
| 46 |  |
Jump off of curvy bridge onto rooftop. |
| 47 |  |
Under road tunnel. |
| 48 |  |
Basketball court. |
| 49 |  |
Stadium-Shoreside bridge. |
| 50 |  |
Under the park bridge. |
| 51 |  |
End of south dock. |
| 52 |  |
Alley near Callahan Bridge in Newport. |
| 53 |  |
Museum. |
| 54 |  |
Pier, south of Callahan Bridge. |
| 55 |  |
Behind Police Station. |
| 56 |  |
Newport, path to Police Station. |
| 57 |  |
Behind Church. |
| 58 |  |
End of the alley near Hyaku Dojo. |
| 59 |  |
Underground AMCo. parking. |
| 60 |  |
Top of AMCo. roof. |
| 61 |  |
Bedford Point in a glass-breakable building. |
| 62 |  |
Doorway, facing an intersection. |
| 63 |  |
On roof in the "projects." |
| 64 |  |
Behind rocks on pavement near the Pier. |
| 65 |  |
Behind a building in the "projects." |
| 66 |  |
Underground car park. |
| 67 |  |
On top of a pedestrian only walkway. |
| 68 |  |
Behind "star statue" logo. |
| 69 |  |
On top of Kenji's Casino. |
Staunton Island Detailed Locations Guide
Welcome to the thriving business district of Liberty City. This area is more complex than Portland and you will have to watch out for attacks from the Colombians as you go about your search.
Once you are settled in your new hideout, go right, right, left and right again past the sports stadium (also confusingly called the coliseum on the list) and out along the road until you spot a turnoff to your left. At the end of the road is the army surplus store. The gates won't open for now, so go around the back on foot to find the hidden package (34.)
From your hideout again go right and right again and then straight ahead to the steps leading up to the stadium. The package is at the top of the steps (37.)
Now circle the stadium exterior looking behind all the Rockstar billboards until you find package 35.
Now you need to visit the hospital. You can get yourself wasted or you can go left from the hideout, bear right and then left at the lights. Go along to the end and go right along the curving road into the hospital car park. Carry on round to the main entrance to spot the package on the roof. You'll need to park an ambulance next to the roof and jump up from there (36.)
Now you are going to university. Same route from the hideout as for the hospital but look for the building opposite the construction site and park by the large sign for 'St Mathias University.' Jump down next to the sign and pick up the package by the side of the building (38.)
Packages 39 and 42 are on the construction site you can see across the road from the university. Cross the road and follow the road around to the right and crash through the barrier on your right. Go towards the blue structure and go left up a board ramp into the incomplete building. Along to the end and up the stairs on your right. The package is in a room opposite the health and armour pickups.
Go back down the ramp and go left and left again and along to the end where you will find the next package in a corner on the ground.
Now hijack a cartel cruiser and go back to your hideout. From the hideout go left, left and right and look for a gate across the road to your left. This leads into the Colombians garage and you need to be in a cruiser for the gates to open. The package is in one of the open garages (41.)
Now back to your hideout and SAVE! This next package carries some risk of being wasted as you try to obtain it. Go left, right and along to the end. Go left and look for the bridge with curved girders as the sides. Try to ignore any Colombians who are shooting at you and hop up onto the curved sides (this is where you risk drowning!) Walk along the girders until you reach the center of the bridge to pick up package 40.
Now you are the proud owner of a shotgun pickup back at base.
For package number 43 go right from the hideout, take the second left along the colored surface. Then straight ahead and just past the end of the car park wall on your left turn into the alleyway. In the enclosed area with the ramp up to the paint/spray shop look for the package in an open garage across from the ramp.
Now leave the area by one of the alleys leading to the multi-story car park and go up to the first floor to find package 44 in a corner close to the northern ramp.
No 45 is in an alleyway just past the fire station. From the hideout go right, right, right, left and left again and check for the fire engines.
Number 46. This is the hardest package in the game in my opinion. Both in working out that there is a package there and then getting to it. From the hideout go right and along to the end. Then right and along to the end again. Take a right to get onto the curly bridge leading up to the main Staunton/Shoreside bridge. On the left of the bridge as you go up look out for two buildings that join, one with a brown exterior and the other with a grey exterior. Aim for the intersection between them and take a running jump off the edge of the bridge to land on a roof and pickup the package.
You can also use the ambulance to get on to this roof top (like you did at the hospital) instead of getting on the ramp and looking for the building and jumping down.
From hospital, jack an ambulance and take the exit out of the hospital. The road will lead you directly to the stadium. Make a left, drive to the end then right, left, left. Park immediately on the left once you make the last left. Park the ambulance close to the building and hop up on the ambulance and onto the ledge.
To get package 47 take the same route as you did to get to the curly bridge but go right just at the end of the park walls. Then go left down the ramp and right along under the road tunnel. The package is on the right just at the end.
Numbers 48 and 50 are in the park. This is a short walk after turning right outside the hideout. At one end is a boating lake and past that is a basketball court. The package is in the court. Back towards the center of the park is a bridge with a package on the path underneath.
To get to package 49 on the main Staunton/Shoreside bridge you need to have access to Shoreside. Get onto the middle section of the bridge (the part which goes up and down) and hop up onto your car and the central divider. As the bridge goes up the package will come into view.
From your hideout go right and take the second left, straight ahead and follow the road around then left into the apartment block grounds. Go right and along to the end and take the stairs down to the dock. Package 51 is at the end.
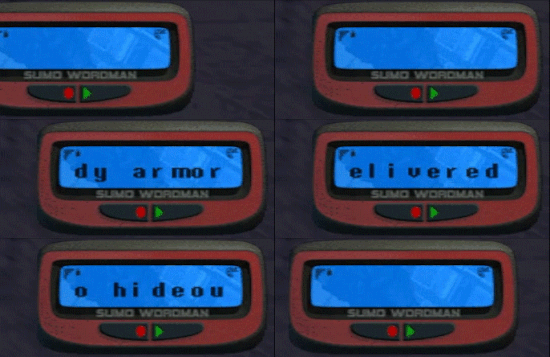
50 packages and body armor pickup at your hideout.
As you emerge from the apartment block go left and all the way along through the container yard and lorry yard until you have gone under the bridge. Go down the steps to your left to the dock and find package 54 at the end.
Back to your hideout and then from there go right, along to the end, bear left and then second right at the lights. Package 52 is at the end of the L shaped alley to your left.
Go left and left again to see the imposing museum building complete with Grecian columns. Climb the stairs to find package 53 at the top to the left.
From your hideout again (since you ARE going back here to save at regular intervals!) right, along to the end, right then left and count the turnings until the third on the right. Park by the cement planters full of shrubs. Go down the ramp to your left into the underground car park where you will find package 66 hiding.
As you exit the car park ramp, turn left and climb some stairs up to a parapet and rooftop where you can hop up to get package 63.
Jump down into the enclosed area and go to the far side to find package 65 lurking by some green dumpsters. Turn right from the dumpsters and exit the enclosed area and turn immediately left to find package 62 in a doorway.
Turn left as you come out of the doorway and go along to the edge of the shoreline and turn left. Go down the ramp you find a short way along to your right and at the bottom behind some rocks is package 64.
Go back to the top of the ramp and go right. Stop at the pedestrian only bridge crossing the street to your left and go up the stairs and into the middle to pick up package 67.
Go back to your car and carry on along the road until you see a large star shaped statue on your left in a sunken area. Package 68 is behind it.
Finally at the end of this road turn right and go along to the end and park by the casino. Climb all the stairs to the helipad on the roof to find package 69.
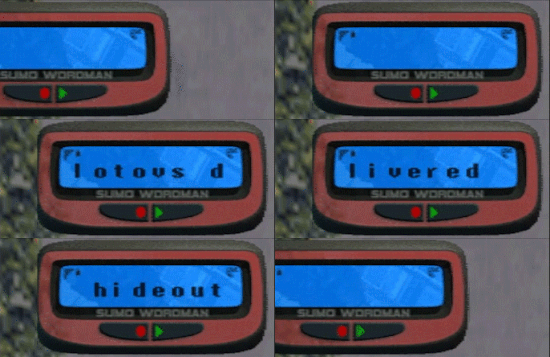
60 packages gives you molotovs back at base.
As you come out of the casino turn right and then left and go down the stairs to the police station to your right. Go up to the main entrance and jump down to the left and go along to the yard at the rear to locate package 55.
Drive a police car to the gates at the left to make them open, then jump down to the left of the gates to see package 56 in a parking niche straight ahead.
Now we are off to church. From your hideout go right, along to the end, go right and first left and look out for the distinctive church building on your right. Package 57 is round the back to the left.
Carry on along this road and take the next left. Look for a long very thin alley on your map (it is on your left next to the Dojo.) Package 58 is at the end.
Now we need to find the AMCO building. From the hideout go right, bear left and then second right at the lights. The AMCO building is down this street on the left (look out for the big red AMCO sign above the entrance.) Go down the steps into the underground car park to find package 59 by the elevator.
Leave the car park through the barriers and as you leave hop up right onto the raised section around the side of the building. Go around until you find the stairs and then climb and climb several sets of stairs until you get to the roof and package 60.
As you come out at the bottom of the first flight of stairs, look to your right to spot an empty building with large tempting plate glass windows. Smash these and go up the stairs to find package 61.
Once you have picked up package 49 from the Staunton/Shoreside bridge you should have all the packages for this island. Check your stats to find a total of 69!
Shoreside Vale
Shoreside Vale Locations
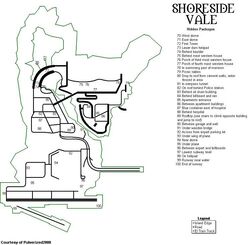
| # | Image | Location description |
|---|---|---|
| 70 |  |
West Dam. |
| 71 |  |
East Dam. |
| 72 |  |
Tower 1, Dam. |
| 73 |  |
"Exchange" helipad in the lower dam. |
| 74 |  |
Behind boulder, corner of dam. |
| 75 |  |
Behind the furthest Swank house. |
| 76 |  |
Front porch, third Swank house. |
| 77 |  |
Front porch, fourth Swank house. |
| 78 |  |
Colombian mansion. |
| 79 |  |
Picnic tables. |
| 80 |  |
Fudge Packing Factory. |
| 81 |  |
Cedar Grove, in overpass |
| 82 |  |
Pike Creek – Roof of Police Station. |
| 83 |  |
Pike Creek – behind drums. |
| 84 |  |
Behind hideout. |
| 85 |  |
Wichita Gardens, apartment entrance. |
| 86 |  |
Wichita Gardens, in between apartments. |
| 87 |  |
Pike Creek, on blue container. |
| 88 |  |
Behind Hope Medical College. |
| 89 |  |
Roof of a large building with a weird awning. |
| 90 |  |
Pike Creek, between Turtle Head Storage. |
| 91 |  |
Wichita Gardens, under wooden bridge. |
| 92 |  |
Francis International Airport, parking lot. |
| 93 |  |
Airport, under wing in hangar. |
| 94 |  |
Airport, on ground next to dome. |
| 95 |  |
Airport, under a plane. |
| 96 |  |
In front of airport. |
| 97 |  |
Subway. |
| 98 |  |
Airport, helipad. |
| 99 |  |
Airport runway. |
| 100 |  |
Airport, end of runway. |
Shoreside Vale Detailed Locations Guide
Since the Francis International Airport is the first major location you come to as you arrive in Shoreside, let's start here. Whether you come out of the tunnel or over the bridge from Staunton, make a left at the traffic lights and go all the way along to the end of the terminal building and left and up the stairs. Go down into the subway and go left and right at the bottom of the escalators and all the way along and to the end to find package 97 on the lowest level.
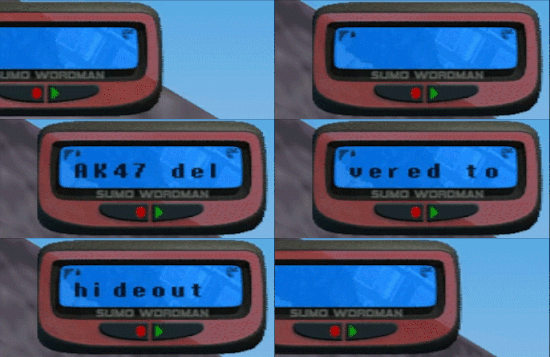
Now we have 70 packages and an AK-47 pickup at the hideout.
As you come back down the steps towards the airport look to the left to spot some billboards. Package 96 is hiding behind them.
Now go back along the front of the airport and turn left at the end and park next to the airport fire engine. Package 92 is by the fire engine.
Go forward from the fire engine and left through the small gap in the wall. Walk around to your right to find package 94 next to the dome on the ground.
Back to your car and drive ahead crashing through the barrier. At the 4th hangar up on your left go towards a plane parked in front of this hangar. Package 93 is under its wing.
Carry on around the airport perimeter until you reach the helipad on your left. Climb the steps to find package 98.
At the start of the runway that goes off diagonally into the bay go down the slipway at the side to find package 99.
From here head back towards the main dome of the airport passing a hangar with lots of helicopters outside. Package 95 is under plane with near here with its tail towards you.
Finally go along to the very end of the main runway and drop down to the right to find package 100.
As you exit the airport go left and look out for a dirt road between the trees to your right. At the end is a broken wooden bridge. Carefully descend the slope to find package 91 under this bridge.
Now find your hideout and save your game.
From the hideout go around the back of the building and look for a blue Toyz'n The Hood van parked by some billboards. Package 84 is behind it.
From your hideout make a left and go all the way to the end, turn left and look for a dirt road to your right. Go along this until you see a picnic area at the end. Package 79 is to the right of the picnic tables.
Now we have 80 packages and a sniper rifle back at base.
From the entrance to the dirt track go straight ahead and immediately left into the apartment blocks. Go under the road bridge between the blocks and ahead to find package 86 between two buildings.
Go back under the road and round to your left to find package 85 in the entrance to one of the apartment blocks.
Now we are going to visit the 'swank' houses in Shoreside to pick up packages 75 – 78 on the list.
From the hideout go left and left again. Follow the road as it curves up the hill. At the top you will be in a road lined with large houses in their own grounds. You will need to hijack a cartel cruiser to open the gates in the last in the row. The packages are either behind or on the porches of these palatial residences.
The Cochrane Dam is a major and prominent feature of Shoreside and there are several packages hidden around it. Let us start at the top. From the hideout follow the route to the swank houses road and carry on past the Colombian mansion and around and to your left by the blocked tunnel entrance. At the end of the next road make a right and a left and stop by each of the jetties with the round structures at the end. Behind these structures are packages 70 and 71.
Now turn around and go back and right and follow the road down and round to an entrance on your right. This leads to the base of the dam.
Stop at the first long set of stairs up to a tower and at the top of the stairs you will find package 72.
Now go along to the end and up the stairs to the large flat area to locate package 73.
To avoid a long trip, if you simply jump off immediately in front of this package you will land right next to package 74. You can pop round the corner to pick up some health if required after your long drop.
At the top of the road leading away from this area you will see the Turtle Head Storage Company building. Cross the road and through the entrance on the left and go around the side of the building to find package 90.
This next section is best done on foot as there are many twists and turns and most of the locations cannot be reached in a vehicle.
Carry on around the building into the yard and look to your right to see a set of stairs. Climb these to the roof. Avoid the rampage icon unless you want to get embroiled in destroying vehicles with a rocket launcher. Jump from this roof to the 'awning' on the building opposite and go along to the end to find package 89.
Jump down and go straight ahead and out of the yard. Cross the road and go ahead up the road by the side of the Punk Noodle factory. Carry on past the AMCO building on your right and then take the next left across the road. Where the low wall on your left joins a higher wall, take a running jump over the low wall to land on a red container with package 87 on top.
Go back to where you made the jump and carry on to the top of the street and go left into the hospital and round back to pickup package 88.
Go back to where you entered the hospital and cross the road and go around to the left of the police station. Jump onto the roof of the row of low sheds to the left of the police station to find package 82. If your armor or health are low replenish them with the pickups in the workshops nearby.
Go back to the Police Station entrance and turn right and walk along until you come to an entrance in a wall just past some large storage tanks. Go through here and round to the right between the tanks and climb a pipe to get onto the wall.
Walk ALL the way along the wall (if you press Select until you get the overhead view this makes it easier) until you come to a greenish roof to your right. Jump down onto the roof and cross the gap onto the next roof where you should spot an enclosed area containing package 80. Jump down from the roof. Leave this area using the plank ramp and jump over the wall.
From the junction where you land go down the hill past the 'Welcome to Pike Creek' sign on the wall. As you cross the next street you will see the Liberty City Pharmaceuticals factory sign on the large building ahead. Circle the building until you find an entrance and go to the right and enter a fenced off area with package 83 by some drums at the end.
Now check your stats to make sure you have 99 packages, I hope so!
The final package is best reached from your hideout. Go left and down to the bottom of the hill and make a right. Follow the road around and just past the entrance to the tunnel on your right you will find package 81 on the pavement in an underpass.
Now you should have 100 packages, be $1,000,000 better off and have a rocket launcher pickup back at your hideout!
Interactive map
Video Walkthroughs