Imperial light cruiser. They haven't detected us yet.Hera Syndulla to her fellow Spectres
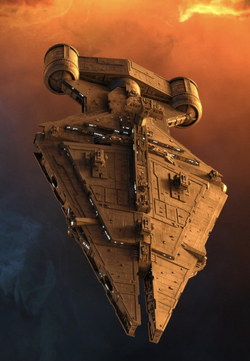
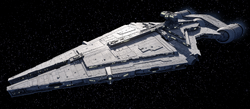
The Arquitens-class command cruiser, also known as the Imperial light cruiser, was a multipurpose light cruiser used by the Imperial Navy, in which it filled roles from detached patrol vessel to communications ship to capital ship support. It was a reworking of Kuat Drive Yards' Arquitens-class light cruiser, though they shared only structural similarities.
Characteristics
The Arquitens-class command cruiser[2] was manufactured by Kuat Drive Yards for the Imperial Navy, initially entering service[1] as a reworking of the Arquitens-class light cruiser which had served with the Republic Navy.[17] The multipurpose light cruiser design served in a variety on roles, protecting remote Imperial assets, performing detached patrol duties in the Outer Rim Territories, acting as support to larger battle groups, serving as an armed transport,[1] and as a communications ship.[5]

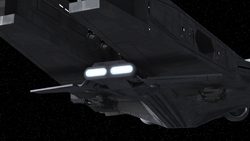
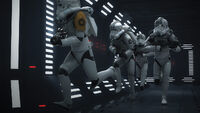
Measuring 230 meters in length,[4] the command cruiser had several subtle updates in its design despite appearing to be a simple repaint of its predecessor;[17] in reality they shared few characteristics besides the basic hull shape—kite-shaped hulls with two forward spars—and the class name.[1] Structural changes included an enclosed horizontal housing on the three powerful main engines, as well as the shape of its bridge tower.[5][1] The Republic variant's side-mounted turbolaser batteries were removed and replaced with eight escape pods,[11] and lateral entry ways near the bow allowed the deployment of Imperial Jumptroopers.[10] The vessels also featured a detention block.[18]
The Arquitens-class was armed with four turbolaser batteries, eight quad laser batteries mounted on four turrets–two dorsal and two ventral, four forward-mounted concussion missile launchers on the port and starboard[1] and a tractor beam projector.[19] However, an Arquitens-class could also be armed with three dorsal quad laser battery turrets, two ventral turrets, six twin laser cannon turrets– with two mounted near the engines at the dorsal and ventral hull, and the other four placed above the port and starboard docking tubes on the dorsal and ventral sides. It additionally had a dorsal missile launcher, and its four concussion missile launchers.[20]
Under the Class 546 program, an Arquitens could be adapted for greater speed by becoming a Class 546 Cruiser.[21] The Arquitens-class was protected by deflector shields[5] and equipped with a class 2 hyperdrive with a class 12 backup.[1] The cruiser's small craft launch and recovery systems, positioned between the two spars,[1][5] could dock either a Sentinel-class landing craft,[5] two TIE/ln space superiority starfighters,[6] TIE/sa bombers,[10] TIE/d "Defender" Multi-Role Starfighters,[8] or three TIE/IN interceptors.[9]
History
Several years prior to 4 BBY,[22] the Imperial Navy recalled all of the Arquitens-class light cruisers still in service to Kuat Drive Yards, where they would be refitted as part of a service life extension program. The result, the Arquitens-class command cruiser, featured radically improved speed, agility, combat ability, power output, and other systems, in line with the navy's order of battle. Though this generation of refits would eventually be retired due to age, they would be replaced by production-line command cruiser variants that served well into the Imperial Era.[1]

About four years before the Battle of Yavin, after Grand Moff Wilhuff Tarkin ordered the destruction of the planet Lothal's Imperial Communications Center, the local Imperial forces used an Arquitens-class command cruiser[5] known as the Tellstar[23] to capture and relay information from surface courier droids brought aboard.[3] It was successfully infiltrated by a team of Lothal-based rebels known as the Spectres to discover the location of Kanan Jarrus, a Jedi who survived the destruction of the Jedi Order at the end of the Clone Wars.[5]
Several command cruisers also responded to an attack by Phoenix Cell on an Imperial convoy.[24] Later on, during the blockade of Ibaar, at least three of them worked alongside a pair of Gozanti-class cruisers under the command of Imperial Security Bureau Agent Alexsandr Kallus to prevent Phoenix Squadron from delivering relief supplies to the starving Ibaarans. The Imperial blockade was successful in driving off the first run of Phoenix Squadron, but was broken in the second run when the rebel fleet was joined by the prototype B-wing fighter, which possessed a beam cannon strong enough to pierce the shielding and armored plating of one of the blockades' three Arquitens-classes. The command cruiser's destruction allowed the rebel cell to make their run and drop the relief supplies before jumping into hyperspace once again.[13]
Above the planet Garel, a command cruiser was on patrol in the system until they received word of a theft of a shuttle from Garel City Spaceport and was deployed to investigate. Arriving in orbit above Garel the Imperials found the aforementioned transport docked with the Shadow Caster; opening a channel with the ships, the Imperials demanded them to surrender and prepare for boarding. Unknown to the Imperials, the shuttle was taken by Lothal rebel operative Sabine Wren who specialized in explosives and was working alongside her old friend, the bounty hunter Ketsu Onyo, Wren devised a plan to escape by overloading the shuttles' hyperdrive while escaping aboard the Shadow Caster. Wren alerted the Arquitens-class that their ships were damaged and their hyperdrive was in danger of self-destructing; buying the rebels time to plan for an escape on the Shadow Caster. Wren then planted explosive charges on the shuttles' control panel and re-activated the shuttles' droid pilot, telling him that his ship was going to come under attack by the command cruiser, and suggesting for it to enact emergency protocols to escape destruction. Wren evacuated aboard the Shadow Caster with Onyo, Chopper, and EG-86 while the GX1 shuttle was caught in a tractor beam and dragged towards the command cruiser before exploding. The resulting explosion damaged the command cruiser's tractor beam projector, allowing the Shadow Caster to break free and escape into hyperspace.[19]
Two Arquitens-class command cruisers were assigned as an escort detail for the prototype Imperial Interdictor under the command of Admiral Brom Titus while it was undergoing trial runs in the Del Zennis system. During the trial runs, the Interdictor managed to capture the flagship of the Phoenix rebel cell: the Liberator, along with Ezra Bridger and the cells' commanding officer Jun Sato. The victory was short-lived however, as the rebels managed to escape capture and sabotage the Interdictor's gravity wells before escaping back aboard the Liberator. Admiral Titus, in a last ditch effort, activated the ship's gravity well to pull the rebels flagship back; but due to Chopper's sabotage to the gravity well generators, the command cruisers were also dragged in towards the Interdictor, crashing into the ship and allowing the Liberator to jump to hyperspace before the Interdictor itself collapsed in on itself and imploded. Agent Kallus arrived shortly afterwards to find Titus in an escape pod, and chastised the admiral for not heeding his advice earlier regarding Ezra.[25]
Following the revelation of the rebel forces being stationed on Garel, the entirety of the Imperial fleet stationed over Lothal departed,[26] leaving behind a minimal garrison, including at least one command cruiser under the command of Lieutenant Yogar Lyste to oversee the planet in case of another insurgency. Lystes' Imperial cruiser later encountered Princess Leia Organa as she flew in with relief supplies for Lothal on her Sphyrna-class Hammerhead corvettes, which she intended to deliver to Phoenix Squadron; after checking her codes, the Princess was allowed to land on Lothal.[27]

Later, Agent Kallus received word of the Spectres' activity on the planet Nixus and departed with Admiral Kassius Konstantine aboard Kallus' personal command cruiser to intercept the rebels, only arriving into the system mere moments before the Ghost jumped into hyperspace past them. Using the hidden tracker built into Hondo Ohnaka's communicator he gave to Ezra, Agent Kallus pursued the Ghost through hyperspace until reaching Wild Space, where he re-encountered the Ghost heading towards an imploded star cluster. Kallus hailed the Ghost offering a chance for the rebels to turn themselves in or be pulled in by the star cluster, only for the Ghost to fly ahead towards the cluster. Kallus ordered the launch of a pair of TIE fighters to try and slow the Ghost down long enough to get them in range of a tractor beam. Due to the Ghost being placed under the influence of Garazeb Orrelios's bo-rifle, however, the ship remained intact while the TIE fighters were both torn to pieces. Seeing the freighter's success in navigating the cluster prompted Kallus to begin a bombardment with the command cruisers' quad laser turrets, only to have the blasts get pulled into the gravity wells of the stars ahead of them. Kallus then ordered the command cruiser to pull back when he began to see dorsal sections of the hull get torn off and pulled into the stars.[6]
In 2 BBY, an Arquitens-class command cruiser intercepted a rebel convoy near Teralov. The cruiser launched three TIE Interceptors which wiped out the convoy.[9] Later, Grand Admiral Thrawn observed Cham Syndulla and the Spectres escape from a trap set by Captain Slavin from the bridge of a command cruiser. He allowed the Ghost to escape because he believed the rebels deserved their victory.[28] Later, Admiral Konstatine commanded a single command cruiser, two Gozanti-class cruisers, and several TIE fighters and bombers during a skirmish over Mykapo. It was badly damaged when the Spectres and Iron Squadron dropped a magno-mine over the cruiser's forward compartment.[29]
Captain Brunson later commanded a command cruiser which attempted to hunt down and destroy the Ghost on Geonosis, sending many jumptroopers to attack. However, the Spectres defeated the jumptroopers and used proton torpedoes to damage the ship and flee into hyperspace.[10] Lieutenant Yogar Lyste later commanded an Arquitens-class command cruiser stationed above Lothal which captured the rebel operative Ezra Bridger. However, Ezra's capture was a ruse to rescue the rogue ISB Agent Kallus, who had become a rebel agent known as Fulcrum.[18] One command cruiser attempted to capture the rogue senator and rebel leader Mon Mothma but was badly damaged by Gold Squadron.[30] Several command cruisers participated in Thrawn's assault on the planet Atollon, in which they attempted to cut the rebels off.[31]

Soon after the rebel defeat on Atollon, the Rebel Alliance launched a mission to Jalindi to hijack the outpost there in order to spy on Imperial fleet movements in 1 BBY. This attempt was thwarted by the Arquitens-class cruiser Marauder, commanded by Titus. After a skirmish, the Partisans arrived and destroyed the outpost, resulting in a massive explosion that also claimed the Marauder.[8]
A prison-tug, a modified variant of the Arquitens-class command cruiser, pulled Accresker Jail, a wreckage-prison, into battle in order for it to deploy its convict army. After some deadly spores were discovered in the prison, it was decided that it would be shot into a rebel planet, and the cruiser was sent hurtling into the wreckage.[32] Following the Battle of Endor in 4 ABY, Arquitens-class cruisers were already an uncommon sight, largely due to an assault on the Fondor Shipyards in the same year that caused the shortage of available cruisers. One cruiser was present on the Imperial world Vardos during a skirmish there soon after the Imperial defeat on Endor, and another participated and was destroyed in a skirmish on Takodana in 5 ABY.[33] One Class 546 model of this cruiser was under the command of Moff Gideon and his forces sometime after the Battle of Endor.[15]
Behind the scenes
The Arquitens-class command cruiser was originally created for the animated series Star Wars Rebels. It first appeared in "Rebel Resolve," the fourteenth episode of the show's first season,[5] which originally aired on February 23, 2015.[34] The command cruiser was reworked from the Arquitens-class light cruiser that appeared in the earlier Star Wars: The Clone Wars animated series, featuring subtle updates to its design, and was inspired by the transition of Venator-class Star Destroyers into Imperial vessels seen at the end of Star Wars: Episode III Revenge of the Sith.[17] Various elements of the Arquitens-class asset were reused to create the Quasar Fire-class cruiser-carrier[35] and class four container transport.[36]
Although initially said to be the same as the Arquitens-class light cruiser,[3] it was later identified as the Arquitens-class command cruiser by Star Wars: Armada's Imperial Light Cruiser Expansion Pack, clarifying the two to be separate models.[2]
Appearances
- Star Wars Battlefront II
- Star Wars: Starfighter Missions
- Lost Stars webcomic
- Star Wars Rebels: Battle to the End
-
 Star Wars Rebels — "Rebel Resolve" (First appearance)
 - Star Wars Rebels: The Siege of Lothal
-
 Star Wars Rebels — "Brothers of the Broken Horn"
 -
 Star Wars Rebels — "Wings of the Master"
 -
 Star Wars Rebels — "Blood Sisters"
 -
 Star Wars Rebels — "Stealth Strike"
 -
 Star Wars Rebels — "A Princess on Lothal"
 -
 Star Wars Rebels — "Legends of the Lasat"
 -
 "Escaping the Scrap Pile" — Star Wars Rebels Magazine 19
 -
 Star Wars Rebels — "Homecoming"
 -
 Star Wars Rebels — "The Forgotten Droid"
 - Star Wars Rebels: Steps Into Shadow
-
 Star Wars Rebels — "The Antilles Extraction"
 -
 Star Wars Rebels — "Hera's Heroes"
 -
 Star Wars Rebels — "Iron Squadron"
 -
 Star Wars Rebels — "Ghosts of Geonosis"
 -
 Star Wars Rebels — "Through Imperial Eyes"
 -
 Star Wars Rebels — "Secret Cargo"
 -
 Star Wars Rebels — "Zero Hour"
 -
 Star Wars Rebels — "In the Name of the Rebellion"
 -
 Star Wars Rebels — "The Occupation"
 -
 Star Wars Rebels — "Rebel Assault"
 -
 Star Wars Rebels — "A Fool's Hope"
 - Doctor Aphra (2016) 20
- Doctor Aphra (2016) 21
- Doctor Aphra (2016) 22
- Doctor Aphra (2016) 23
- Star Wars (2020) 1
- Star Wars (2020) 10 (Wreckage only)
- Star Wars (2020) 14
- Bounty Hunters 16
- Crimson Reign 3 (In flashback(s))
- Doctor Aphra (2020) 22 (In flashback(s))
- Star Wars: Squadrons
- "False Histories" — Battle of Jakku — Last Stand 1
- The Mandalorian Season 2 Junior Novel
- The Mandalorian – The Graphic Novel of Season 2
- The Mandalorian: The Path of the Force
-
 The Mandalorian — "Chapter 12: The Siege"
 -
 The Mandalorian — "Chapter 14: The Tragedy"
 -
 The Mandalorian — "Chapter 15: The Believer"
 -
 The Mandalorian — "Chapter 16: The Rescue"
 - The Mandalorian: The Rescue
-
 The Mandalorian — "Chapter 22: Guns for Hire"
 -
 The Mandalorian — "Chapter 23: The Spies"
 -
 The Mandalorian — "Chapter 24: The Return"
 - Choose Your Destiny: A Scavenger Mission (Mentioned only)
Non-canon appearances
- Disney Magic Kingdoms
-
 LEGO STAR WARS: Celebrate the Season — "Ghost Ship"
 -
 LEGO STAR WARS: Celebrate the Season — "Trick-or-Treat"
 - LEGO Star Wars Terrifying Tales (In flashback(s))
Sources
-
 "Rebel Resolve" Episode Guide | Star Wars Rebels on StarWars.com (backup link)
 - Star Wars Rebels: Visual Guide: Epic Battles
-
 "Wings of the Master" Episode Guide | Star Wars Rebels on StarWars.com (backup link)
 -
 "Homecoming" Episode Guide | Star Wars Rebels on StarWars.com (backup link)
 -
 Star Wars: Build the Millennium Falcon 60 (Starship Fact File: Arquitens-class Light Cruiser)
 -
 "The Forgotten Droid" Episode Guide | Star Wars Rebels on StarWars.com (backup link)
![]() Star Wars: Armada — Imperial Light Cruiser Expansion Pack (First identified as Arquitens-class command cruiser)
Star Wars: Armada — Imperial Light Cruiser Expansion Pack (First identified as Arquitens-class command cruiser)
-
 "Ghosts of Geonosis" Episode Guide | Star Wars Rebels on StarWars.com (backup link)
 -
 Star Wars Helmet Collection 37 (Databank A-Z: Luggabeast–Malakili) (Indirect mention only)
 -
 Star Wars Helmet Collection 55 (Databank A-Z: Saesee Tiin–Toydaria) (Indirect mention only)
 - Dawn of Rebellion
- Star Wars Encyclopedia of Starfighters and Other Vehicles
-
 Star Wars Helmet Collection 80 (Highlights of the Saga: A Perilous Mission)
 - TIE Fighter Owners' Workshop Manual
- Ultimate Star Wars, New Edition
-
 Every Type of Ship in Rebels | Star Wars By the Numbers on the official Star Wars Kids YouTube channel (content now obsolete; backup link)
 - Starships and Speeders
-
"Imperial Troops" — Star Wars Encyclopedia (Picture only)
-
"Republic, Rebel, and Resistance Starfighters" — Star Wars Encyclopedia
-
"Starships of the Empire and the Rebellion" — Star Wars Encyclopedia
- Star Wars: Battles that Changed the Galaxy (Picture only)
- Star Wars: The Mandalorian Handbook
-
 "The Anti-Hero's Journey" — Star Wars Insider 217 (as Arquitens-class light cruiser)
 - Star Wars Encyclopedia: The Comprehensive Guide to the Star Wars Galaxy
-
 B-Wing Prototype (Blade Wing) in the Databank (backup link) (Indirect mention only)
 -
 Captain Brunson in the Databank (backup link)
 -
 GX1 Short Hauler in the Databank (backup link)
 -
 Imperial Light Cruiser in the Databank (backup link)
Non-canon sources
Notes and references
- ↑ 1.00 1.01 1.02 1.03 1.04 1.05 1.06 1.07 1.08 1.09 1.10 1.11 1.12 1.13 1.14 1.15 1.16 1.17 1.18 1.19 1.20 1.21 1.22 1.23 1.24 1.25 1.26 1.27 1.28 1.29 Dawn of Rebellion
- ↑ 2.0 2.1 2.2 2.3
 Star Wars: Armada — Imperial Light Cruiser Expansion Pack
- ↑ 3.0 3.1 3.2
 Imperial Light Cruiser in the Databank (backup link)
- ↑ 4.0 4.1
"Starships of the Empire and the Rebellion" — Star Wars Encyclopedia
- ↑ 5.00 5.01 5.02 5.03 5.04 5.05 5.06 5.07 5.08 5.09 5.10 5.11 5.12 5.13
 Star Wars Rebels — "Rebel Resolve"
- ↑ 6.0 6.1 6.2 6.3
 Star Wars Rebels — "Legends of the Lasat"
- ↑ 7.0 7.1 Starships and Speeders
- ↑ 8.0 8.1 8.2
 Star Wars Rebels — "In the Name of the Rebellion"
- ↑ 9.0 9.1 9.2
 Star Wars Rebels — "The Antilles Extraction"
- ↑ 10.0 10.1 10.2 10.3 10.4
 Star Wars Rebels — "Ghosts of Geonosis"
- ↑ 11.0 11.1
 "Rebel Resolve" Concept Art Gallery on StarWars.com (backup link)
- ↑
 B-Wing Prototype (Blade Wing) in the Databank (backup link)
- ↑ 13.0 13.1
 Star Wars Rebels — "Wings of the Master"
- ↑ 14.0 14.1 Star Wars: The Rise and Fall of the Galactic Empire
- ↑ 15.0 15.1
 The Mandalorian — "Chapter 12: The Siege"
- ↑ 16.0 16.1
 The Mandalorian — "Chapter 22: Guns for Hire"
- ↑ 17.0 17.1 17.2
 "Rebel Resolve" Trivia Gallery on StarWars.com (backup link)
- ↑ 18.0 18.1
 Star Wars Rebels — "Through Imperial Eyes"
- ↑ 19.0 19.1
 Star Wars Rebels — "Blood Sisters"
- ↑ Star Wars: Squadrons
- ↑ Star Wars: Battles that Changed the Galaxy
- ↑ "Rebel Resolve," the first appearance of the Arquitens-class command cruisers, directly follows the events of "Call to Action," which Star Wars: Galactic Atlas dates to 4 BBY. Dawn of Rebellion states the conversion to the command cruiser variant happened "several years ago". As the sourcebook's in-universe perspective is apparently around the time of Star Wars Rebels, it is assumed here that the conversion took "several years" before the cruisers first appearance.
- ↑
 Star Wars: Build the Millennium Falcon 60 (Starship Fact File: Arquitens-class Light Cruiser)
- ↑ Star Wars Rebels: The Siege of Lothal
- ↑
 Star Wars Rebels — "Stealth Strike"
- ↑
 Star Wars Rebels — "Legacy"
- ↑
 Star Wars Rebels — "A Princess on Lothal"
- ↑
 Star Wars Rebels — "Hera's Heroes"
- ↑
 Star Wars Rebels — "Iron Squadron"
- ↑
 Star Wars Rebels — "Secret Cargo"
- ↑
 Star Wars Rebels — "Zero Hour"
- ↑ Doctor Aphra (2016) 23
- ↑ Star Wars Battlefront II
- ↑
 "Star Wars Rebels Recounted" — Star Wars Insider 156
- ↑
 "Homecoming" Concept Art Gallery on StarWars.com (backup link)
- ↑
 "The Forgotten Droid" Concept Art Gallery on StarWars.com (backup link)
