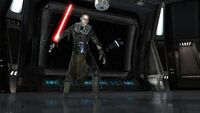
…a boy? Months of attacking Imperial _targets and Vader sends a boy to fight me?Rahm Kota
During approximately 3 BBY, Jedi General Rahm Kota, a survivor of the Great Jedi Purge led by the Sith Lord Darth Vader to eradicate the Jedi Order, led his militia in a battle to claim a TIE fighter construction yard orbiting the moon of Nar Shaddaa as part of a series of attacks on various Imperial _targets, working under Senator Bail Prestor Organa of the planet Alderaan. A brilliant tactician, Kota's battleplan allowed his militia to take over the station.
When it was clear that Kota and his army had a significant advantage over the defending Imperials, Darth Vader resorted to sending in his Sith assassin and apprentice, "Starkiller", to eliminate the threat. However, as Starkiller's existence was highly confidential to only Vader and an Imperial pilot named Juno Eclipse, being a tool in his plot to overthrow Emperor Palpatine, Vader's master, Starkiller was ordered to wipe out all witnesses inside the construction facility, including Imperial stormtroopers. After being deployed into the main hangar bay from his ship, the Rogue Shadow, Starkiller pressed onward through the facility, killing everyone he encountered, effectively ending the combat.
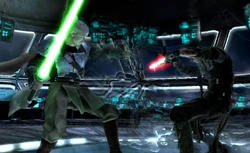
This culminated in a lightsaber duel between Kota and Starkiller, taking place inside an observation tower. Kota used his prowess in the Force to detach the chamber from its base, causing it to freefall towards Nar Shaddaa's moon. Starkiller overwhelmed the Jedi, throwing him with great force into the floor and incapacitating him. In a last ditch effort to defend himself, Kota offered Starkiller a glimpse into his future, one without Vader, before being blinded and thrown out a shattered window, though he managed to somehow survive the ordeal. Starkiller found himself to safety before the observation tower collided with the moon.
Prelude
According to Imperial records, Master Rahm Kota was a respected general in the Clone Wars.PROXY
Jedi Master Rahm Kota was ultimately saved from death during the execution of Order 66 at the end of the Clone Wars by his distrust of the Clone troopers. Believing clone soldiers unfit for battle, he instead relied on a small squad of his own special troops, selected and trained by Kota personally. When Order 66 was executed, there were no clones present to carry it out, and Kota's men would obviously refuse such an order. This allowed Kota to disappear into the Outer Rim Territories, his men joining him. Rahm Kota eventually resurfaced years later as a rebel insurgent, his original men having reformed into a group known as Kota's Militia. Kota was the first to truly rebel against the Empire, setting the stage for many other groups to do the same, ultimately leading to the formation of the Rebel Alliance.[1]
Provided with intel from his contact within the Imperial Senate; Bail Organa; Kota began a guerrilla war against the Empire, attacking numerous outposts and facilities and harassing the Imperial military at every turn. His ultimate plan was to gain the attention of Darth Vader, with the intent of assassinating the Sith Lord. This led him to gradually escalate his game plan, ultimately attacking the TIE Fighter Construction Facility above Nar Shaddaa.[1]
As Kota went about with his war, Vader trained his secret apprentice. Galen Marek, Vader's apprentice had been taken on by the Sith Lord to serve as his tool, working as Vader's assassin during his training. As Kota attacked the facility, Vader declared Marek's training complete. As a test, he sent him to the facility to kill Kota and retrieve his lightsaber. Marek was also given the mandate to kill all combatants, Imperials and insurgents alike, to ensure that there were no witnesses of his existence.[1]
The battle
Kota's assault
Master Rahm Kota. He is attacking a critical Imperial shipyard. Destroy him and bring me his lightsaber.Darth Vader, giving a mission to Galen Marek

While the militia space force engaged TIE Fighters around the facility, Kota's ground forces managed to land within the facility itself. The infantry in the hangar pushed the Imperial stormtroopers back from the bulkhead door. At least one Lambda-class shuttle was destroyed, crashing into the hangar.[1] With Kota leading the charge, the militia swarmed the facility, capturing the command center early on. Executing the stormtroopers within, Kota had his militia lock it down.
He then left instructions for explosive charges to be places throughout the facility, specifically on levels two, nine and twelve, and for militia forces to funnel any enemies towards him. As his men got the command center holoprojector up and running, they received sensor input of an approaching ship; the Rogue Shadow, Marek's ship. Mistaking Marek's ship for Vader's, Kota quietly gloated to having drawn the Sith Lord out of hiding.
He ordered the hangar twelve containment field lowered, and told the men there to get into position.
Starkiller's Intervention

The Emperor cannot discover you. Leave no witnesses. Kill everyone aboard, Imperials and Kota's men alike.Vader's orders to Galen Marek
Marek entered the facility via a service corridor extension next to the hangar. Militia men had dug in with E-WEB blaster turrets and had sealed the doors, preventing any Imperials from escaping the hangar, Marek appeared. He quickly killed all the troopers within the hangar, Imperials and insurgents alike. Using the Force to open the heavy bulkhead door locks, he moved on, cutting down any soldiers unlucky enough to cross his path. As he approached the central factories, his pilot, Captain Juno Eclipse, warned him of a squadron of TIE Fighters in his area, flying about the cavernous space of the hangar.[1]
Navigating the walkways and catwalks of the factory, Marek killed the soldiers in his way while assaulting the TIE fighters with telekinesis and Force lightning. As the battle dragged on and Marek massacred the combatants, the security level of the facility was raised, and an order was issued commanding any unauthorized personnel to be killed.[1] At least 2 TIE Fighters were shot down by enemy fire,[1] and crashed into the walkways. Marek took a lift to the next floor, where the militia and Imperial forces were in a firefight on a bridge leading across the station. A damaged TIE crashed into a walkway and destroyed a portion of it; however, Marek easily jumped the gap and continued his mission. All hangars eventually fell to rebel forces, and the assembly lines began to crumble.[1]
Marek came across several Imperial Navy Commando squads thorough the factory, who where either retreating from pursuing Militia men or were pinned down; all of the Commandos were killed by Marek.
As Marek began breaching the assembly line, Kota's men trapped him within an energy shield. He deactivated it by pulling its generator out of the wall outside the barrier using the Force, and moved on. From there, he confronted an AT-CT walker in the wing assembly, which he compacted into a cube and smashed into the ground using the Force. After clearing the wing assembly, he rode one of the lifting TIE wings to a higher level, from which he entered a cockpit assembly area in which deadly laser arms manufactured the chassis of future Imperial war machines. He eventually reached the watchtower where Kota was waiting for him, after getting through the wing and cockpit factories.[1]
The duel
You're stronger then I thought! But I can't let you live, boy. I'll be sure to send your ashes back to Vader.Rahm Kota, to Galen Marek, before separating the command center from the TIE factory

Breaching the command center, Starkiller confronted the surprised Kota, who had expected Vader to arrive. Despite this, Kota deigned to confront this "boy" anyway.[1]
Marek opened the battle with a blast of Force lightning, which Kota managed to deflect. Seeing the pointlessness of this barrage, Marek broke off and charged the general. Kota managed to duck and sidestep Marek's attacks, slashing at his assailant's legs as he passed. Marek retaliated with a telekinetic blast, which Kota again deflected. Having successfully tested Kota's defenses, Marek adopted a more cautious approach, circling Kota warily and keeping up a light telekinetic attack as he did so, blasting Kota with chair fragments that he had sliced up.[2]
Kota used Marek's pause to attack, coming on furiously and attempting to bring down the darksider with a quick and determined assault. In response, Marek fell back on his knowledge of Soresu to fend off Kota's wild attack. Kota changed tactics, utilizing a slower and more deliberate fighting method interspersed with quick and sudden strikes. Marek continued to fend him off, and as Kota's guard began to slip, he countered. Focusing entirely on Kota, he ignored all else, and their duel raged across the control center.[2]
While Marek acknowledged that Kota was strong and clever in his own right, possessing many moves the darksider had never seen before, he was ultimately able to drive him back. Despite Kota's attempts to regain the offensive or force a mistake on Marek's part, he was quickly wearing out and taking hits.[2] In his desperation, Kota broke off from the duel momentarily. Admitting that he had underestimated Marek, he declared that he couldn't let him live. Telekinetically seizing the entire command center structure, Kota ripped it from the facility and sent it plummeting into Nar Shaddaa's upper atmosphere, citing that he was willing to "bring the facility down onto [Marek and Kota's] heads" if it was necessary to stop him. As the control center flipped over while plummeting, they resumed their duel.[1]

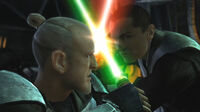
However, Kota was unable to keep up his defense. Marek seized Kota in a telekinetic stranglehold and hurled a chunk of debris at him, which smashed Kota hard into the wall behind him. Keeping up his grip, Marek bashed the hapless general against the floor then flung him against the ceiling, leaping up after him and physically assaulting him before blasting him back down. Kota hit the floor so hard he cracked the glass beneath him. As Kota attempted to regain his feet, Marek leapt at him and attacked. Kota managed to block, initiating a bladelock. As he pushed against Marek's blade, Kota said in a rather cryptic manner that he could see the young man's future, and that he would not always be Vader's servant. As Kota continued looking at the vision, he was startled to see himself as part of his opponent's destiny.[2] Using Kota's surprise at the revelation as an advantage, Marek gained the upper hand. Overpowering Kota, he pushed the blades into his eyes, blinding and stunning him. In agony, Kota sent out a wave of Force energy that shattered the viewports of the command center, dropping his lightsaber in the process. Marek was sucked in briefly, however he still managed to hold on. Wind howled through the command center as debris was sucked out due to the drastic change of pressure, and Kota followed, dropping spread-eagle into the Vertical City below. Vader's apprentice retrieved Kota's lightsaber, taking it as a trophy of his victory.[2][1]
Aftermath
Vader thinks he's turned you... but I can sense your future... And Vader won't always be your master... I sense only... me?Rahm Kota, to Galen Marek, before the former gets blinded in the duel

With Kota apparently dead, Marek departed the control center, leaping onto the hull of the Rogue Shadow as it flew below. Returning to the Executor to report to his master, Marek received a debriefing from Vader, who declared that while he was powerful, he was unfocused and easily distracted. Vader then sent Marek to the Jedi Temple to hone his skills. Once there, Marek carved his way through the Imperial garrison stationed there and made his way to the Jedi Trials Chamber. In the Chamber, he engaged a holographic Jedi training program modeled after the ancient Sith Lord; Darth Desolous.[3] Upon defeating the program, Marek received orders from Vader via PROXY, telling him to find and kill the deranged Jedi Kazdan Paratus on the planet Raxus Prime. Marek did so and preceded to have several other tests of finding and killing Jedi.[1]
Kota's Fate
Kota survived his fall, though blinded and injured from the duel. He went into exile and became a drunk on Cloud City. Marek, remembering Kota's last words, and trying to form up an army of people who were disloyal to Palpatine per Vader's suggestion, decided to locate the Jedi, asking him for assistance. Marek would eventually decided to defect from Vader due to the lies and treacheries bestowed on him, and confront his former master, and die fighting the Galactic Emperor Palpatine. He was killed during the duel with the Sith Lord, though he founded a rebellion, fulfilling Kota's vision.[1]
Behind the scenes
The TIE Fighter Construction Facility level of The Force Unleashed was released as a demo available for download on Xbox Live and PlayStation Network on August 21, 2008. The demo featured enhanced force powers and ended with a special AT-ST boss fight.[4]
On the consoles besides the Xbox 360 and the PlayStation 3, a presumably non-canonical build of the game presents a different approach to the facility. To start off, the Rogue Shadow lands directly in the hangar bay, rather than the service corridor next to it. Starkiller fights his way through a series of corridors, hangars and an assembly line. He brings down a Rebel gunship trying to land in one of the hangar bays, and interrogates a survivor of the crash about Kota's whereabouts. A Rebel is depicted hijacking an AT-ST, and Starkiller destroys it by impaling the pilot and crushing the walker using his power.[4][3] On a related note, a notable difference between the Xbox 360/Playstation 3 versions and the PSP, PS2, and Wii versions is that the former had the Rogue Shadow arriving at the production facility after the insurgents have completely taken it over, whereas the latter had them arriving in the middle of the space battle between the insurgents and the empire. Likewise, although the planting of explosives were referenced by Rahm Kota, they were never detonated in the Wii, PS2, and PSP versions. Also in the Wii/PS2 versions, the facility is still in space after Starkiller's duel with Kota (although the latter does nonetheless mention trying to "bring the facility down on [their] heads" in order to defeat Starkiller late into the fight as well as his attempt at using the Force to cause the room they were in to quake) unlike the Xbox 360/PlayStation 3 versions where the facility fell into the atmosphere. On a related note, the TIE Fighter Construction Facility itself had differing designs between the two versions.
According to Unlockable artwork, the duel between Rahm Kota and Starkiller was originally going to continue on top of the Rogue Shadow, but was dropped for unspecified purposes.
Appearances
- Star Wars: The Force Unleashed
- Star Wars: The Force Unleashed novelization (and unabridged audiobook) (First appearance, in book)
- Star Wars: The Force Unleashed graphic novel (In flashback(s))
Sources
Notes and references
- ↑ 1.00 1.01 1.02 1.03 1.04 1.05 1.06 1.07 1.08 1.09 1.10 1.11 1.12 1.13 1.14 1.15 1.16 1.17 1.18 1.19 1.20 1.21 1.22 1.23 1.24 1.25 1.26 1.27 1.28 1.29 1.30 1.31 1.32 1.33 1.34 1.35 1.36 1.37 1.38 1.39 1.40 1.41 1.42 1.43 1.44 1.45 1.46 1.47 1.48 1.49 1.50 1.51 1.52 1.53 1.54 1.55 1.56 1.57 1.58 1.59 1.60 1.61 1.62 1.63 1.64 Star Wars: The Force Unleashed
- ↑ 2.0 2.1 2.2 2.3 2.4 Star Wars: The Force Unleashed novelization
- ↑ 3.0 3.1 PS3 release of The Force Unleashed
- ↑ 4.0 4.1 Xbox 360 release of The Force Unleashed