| | |
Things were different then. Just us troopers and the Jedi standing between Grievous and his droids and the rest of the universe. I fought everywhere. From Kamino to Tatooine. Rodia to Coruscant. I saw worlds fall. And I learned much from the Jedi. Skywalker, Kenobi, young Ahsoka Tano. We stood together against everything they threw against us. We were heroes.Cody remembers his service during the Clone Wars
Cody, designated CC-2224, was a clone marshal commander assigned to High Jedi General Obi-Wan Kenobi of the Grand Army of the Republic throughout the Clone Wars.
The leader of the 7th Sky Corps, though he typically took personal command of the 212th Attack Battalion, Cody was a loyal and competent soldier who always followed his orders. He was a no-nonsense commander who was very skilled in tactics. Following the issuance of Order 66, however, Cody's loyalty to Kenobi and the Jedi was erased by his secret programming, which led to him turning against Kenobi and the Jedi. He had a 91% similarity to the original clone template of Jango Fett.[3]
Biography
Early life
CC-2224 began his life as one of countless cloned officers slated for a leadership position in the Grand Army of the Republic. Early on in his career, he showed a flair for independent thought that often drew the always-prying eyes of the Kaminoans.[8] The Kaminoans selected him for special training, where he met CT-7567, whom he would later know as Captain Rex.[8] CC-2224 and CT-7567 quickly became friends during their training exercises before Cody was moved to the field.[8]
The Clone Wars
Additional training
As leader and commander of the 7th Sky Corps, CC-2224 was to be paired with a Jedi General. He was pleased to discover that he would be operating under the command of famed Jedi Knight Obi-Wan Kenobi. However, he did not participate in the First Battle of Geonosis.[9] He would later serve under Jedi Master Mace Windu at the Battle of Skor II.[8]
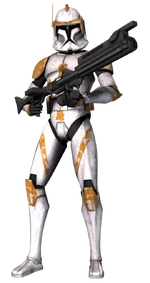
During his service to the Republic, Cody saw worlds fall.[7] Several months into the Clone Wars, CC-2224 was temporarily pulled from the fighting in order to be entered into an experimental training regiment, headed by ARC trooper Alpha, designed to provoke independent thought among the enrolled commanders.[8] As a sign of his new-found independent streak, CC-2224 took the name "Cody," and began customizing his armor with equipment previously available only to the ARCs.[8] Cody's armor modifications included a small, bullet-shaped jetpack, a secondary comm antenna, a visor on his helmet, a pair of antennae on his helmet, enlarged shoulder pads, and a small stick-like tool in an armband on his upper right arm.
Of the hundred commanders put through Alpha-17's training program, a handful were picked by Alpha-17 and assigned to Squad Seven, an elite group of cross-trained commandos made up of the Grand Army's best snipers, demolition experts, and marines, whose role was to accompany ranking Jedi on any type of mission.[8] For their stellar performances, Commanders Cody and Odd Ball were given control over Squad Seven, though Major Jorir handled its day-to-day operations.[8]
Battle of Christophsis
Skywalker should've attacked by now!"
"Don't worry! He knows the plan.Cody to General Kenobi
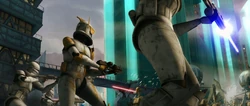
When the Separatists laid siege to a blockaded Christophsis, Generals Obi-Wan Kenobi and Anakin Skywalker were dispatched to aid the planet, along with Cody and Captain Rex. Cody helped Kenobi finish off the rest of the blockade after Anakin destroyed Separatist Admiral Trench. After their forces were deployed, evidence was revealed of a traitor among their ranks.[11] After Sergeant Slick was revealed to have sold their intelligence to Asajj Ventress, reinforcements were dispatched by the Republic, and Cody joined Kenobi and Skywalker in defeating the first wave of droids, under the command of General Whorm Loathsom. A second wave of droids charged and then retreated, blocked by the Republic's heavy cannons. However, their retreat was revealed to be a ploy, as they soon charged again, but this time behind a deflector shield, making the heavy cannons useless. Skywalker and his newly arrived apprentice Ahsoka Tano managed to sneak behind enemy lines and destroy the shield generator, and the heavy cannons were able to obliterate the exposed droids.
Battle of Teth
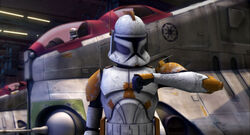
After the Battle of Christophsis, Cody with the troopers of the 212th Attack Battalion accompanied Jedi General Obi-Wan Kenobi to Teth to aid Jedi General Skywalker and the troopers of the 501st Legion. Cody coordinated the gunships on Spirit of the Republic into an assault on the Teth Monastery. Cody and his troopers quick-roped onto the landing platform to back up Kenobi who had already landed to relieve the remainder of Torrent Company. Cody's troops quickly turned the tide of battle.
Inspection of the Pastil Post
The tracking station at Pastil is fully operational. Captain Rex and I are proceeding to the outpost in the Rishi system.Cody reporting in to Generals Skywalker and Kenobi
While completing a series of routine inspections of Republic listening posts, Rex and Cody stopped on Pastil. After Rex learned that a glitching MSE-series droid nicknamed "Rodent" was the source of the station's excessive tidiness, he ordered a Code Aurek alert to find and destroy the droid. The clones first thought Rex to be paranoid; however, after the droid's body was destroyed, it was revealed to be a spy as all four wheels ran off independently in an attempt to escape. The first three were eliminated, but as the fourth wheel began to escape into the grate, clone trooper Stripe used a thermal detonator to eliminate the droid. Somewhat amused, Rex ordered the men to "clean the mess up".
Battle of Rishi moon
Whoa! Rex! What the heck are you doing?"
"Relax. Just as I thought. Looks like one of those new commando droids.Cody and Rex discovering a disguised commando droid
When Cody and Rex arrived for an inspection of a communications station on the Rishi Moon, they were greeted by a droid commando disguised as a clone trooper. The survivors of the station, Hevy, Echo, and Fives, knew they had to warn them. Hevy fired a droid attack flare, and Rex's instincts kicked in, blasting the "clone trooper" in the head. After discovering the commando droid, more droids appeared and ambushed them. The two held them off for a brief moment before the droids threw thermal detonators in their direction. Their shuttle was destroyed in the following explosion, but Rex and Cody managed to jump off the platform and employ ascension cables to safely land. After meeting Hevy, Echo and Fives, Cody and Rex learned that they were the only survivors of the invasion, and led the rookie troopers in an attack to retake the base. Upon destroying the droids and regaining control of the station, the group discovered that the all-clear signal had been hot-wired to keep the Republic unsuspecting of a Separatist fleet, led by General Grievous, intent on destroying Kamino and stopping the Republic's production of clones. As droid reinforcements arrived, the clones planned to use multiple explosives and liquid tibanna to destroy the base and stop the all-clear signal, which would alert the Republic to the Separatists' presence. However, after the remote detonator failed to operate, Hevy sacrificed himself, manually activating the detonator and destroying the station. With the all-clear beacon disabled, the Republic fleet arrived in the system and was able to ward off the Separatists.[12]
Third Battle of Kamino
This is personal for us clones.Commander Cody
Sometime after the destruction of the Rishi Base, Cody along with Jedi Generals Kenobi, Skywalker, and fellow officer Captain Rex watched a intercepted code hologram between General Grievous and Commander Ventress indicating that they were going to attack Kamino. Cody, along with Rex, were sent with their generals along with the rest of 501st to reinforce General Shaak Ti on Kamino. When Grievous arrived, Cody was overseeing the action with Generals Ti, Kenobi, Prime Minister Lama Su and few other clone officers. Just after Grievous and Ventress assaulted Tipoca City, Cody along with Capt. Rex went to the clone barracks to help troopers Echo, Fives, maintenance clone 99, and a few clone cadets. Just as the droids were on the move towards the barracks, Cody, Rex and 99 gathered more weapons. As the droids under the command of General Grievous were about to enter the clone barracks, Cody, Rex and the others ambushed them. Cody and Rex then took cover as the droids came in. Cody threw grenades at the droids just as Rex signaled the cadets to open fire from their bunkers. Cody tried to stop 99 from getting more grenades but he was shot by the droids. After they defeated the droids, Cody called 99 a true soldier. Later, Cody and Rex informed Echo and Fives that they had been promoted to ARC Troopers.[13] At some point after this battle, Cody fought on Tatooine and then later fought on Rodia.[7]
Battle of Ryloth
It's not going to be easy getting to those guns, sir."
"There is always a way, Wooley.Wooley and Commander Cody
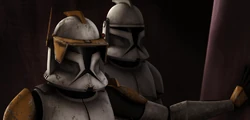
Later, the Republic decided to liberate the Twi'lek inhabitants of the planet Ryloth, who were being oppressed by Techno Union Foreman and Separatist member Wat Tambor. After General Skywalker and his Padawan, Commander Ahsoka Tano, managed to destroy the Separatist blockade surrounding the planet, the invasion forces were able to move in. Aboard an Acclamator assault ship, Cody boarded the Crumb Bomber with General Kenobi and Ghost Company, and the gunships took off to land in Nabat. Kenobi explained to Ghost Company that they had come to aid the Twi'leks, not destroy their home, and Cody instructed his men to utilize blasters and droid poppers only. However, after proton cannons from below attacked the Acclamator transports above, General Mace Windu tasked Obi-Wan and his men with destroying the cannons so that the transports could land. After destroying the droids in a bunker on the outskirts of the village, Obi-Wan and the clones entered the city and set up a temporary camp. Cody went with Wooley, Waxer and Boil to scout ahead, and after he and Wooley went to investigate the courtyard, they discovered that the Twi'leks were being held hostage. After Cody reported their findings back to Obi-Wan and Mace, Obi-Wan decided to continue with the plan; the prisoners would make it difficult, but not impossible.
Cody noticed the prolonged absence of Waxer and Boil, and sent a transmission to them before they moved out. Upon reentering the city, the group was attacked by gutkurrs, but Obi-Wan managed to lure the creatures with the Force into an alley. He instructed Cody and his men to fire at a bridge above the entrance to the alley, and the creatures were trapped. After Obi-Wan jumped over the rubble, Cody handed him back his lightsaber. Waxer and Boil them emerged out of an underground tunnel with the young Twi'lek girl Numa. Cody was initially displeased with their absence, but after he learned of their discovery of the tunnels, he softened up a bit. Cody led a diversion to distract the droids, while Obi-Wan went with Waxer, Boil and Numa through the tunnels to free the Twi'lek hostages. After everyone was in position, Cody led the attack, and Obi-Wan was able to free the prisoners. After heavy fire from the AATs began to harass them, Cody ordered his men to fall back, and the droids pursued them. However, the tactical droid commander TX-20 was alerted to the rescue, and after Obi-Wan managed to destroy the proton cannons with the help of Waxer and Boil, the tactical droid's tank attacked them. Before TX-20 could destroy Obi-Wan and Numa, however, the former Twi'lek prisoners overran the tank and destroyed the droid. Mace and the transports were then able to land, and the Republic forces headed to the capital city of Lessu to retake it and free the planet. Cody and General Kenobi led their forces and took the Jixuan desert, thus securing Ryloth's southern hemisphere for the Republic.
Battle of Felucia
Prepare the troops to evacuate.Kenobi to Cody
Shortly after Ryloth, Cody and General Kenobi were dispatched along Skywalker and fellow clone captain Rex to Felucia, to fight Grievous's forces in the system. However, they were outnumbered and defeated because of the Separatist's vast forces and reinforcements. Kenobi and Skywalker asked for help and Jedi High General Plo Koon commanded a rescue fleet to evacuate the Republic forces on the planet. After evacuating successfully, Cody was sent to Coruscant for a while.[8]
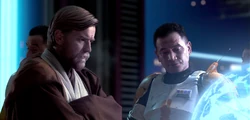
Black Stall Station
Cody went with Jedi Masters Obi-Wan Kenobi and Mace Windu and Cad Bane to Bane's Black Stall Station to recover the holocron containing the list of Force-sensitive infants. He was told to stay with the ship. While Windu set off the station's laser and turret defenses and then retreated with Obi-Wan, he had the ship prepared. The mission proved to be a failure though, because Bane escaped.
Second Battle on Geonosis
Separatist Poggle the Lesser set up new droid foundries on Geonosis. Cody's gunship made it to Point Rain, the landing zone, where he helped Obi-Wan recover during the battle. He then defended the landing zone until generals Mundi and Skywalker arrived. He kept fighting until the shield generator came down. The group then prepared for the factory assault.
Cody went with Anakin Skywalker and Obi-Wan Kenobi to find Poggle and capture him. They tracked him to the Progate Temple, where Luminara Unduli also had tracked him, but been captured by Geonosian zombies. These zombies had been controlled by brain worms that enabled the Queen Karina the Great to keep contact with them even after death.[8] This also made it possible for the drones to continue their attack after being shot or cut by a lightsaber. When Cody, Skywalker, and Kenobi reached the Queen, Cody, together with his men, spread out to ambush Karina the Great and her drones while Kenobi and Skywalker tried to negotiate with the Queen. This, however, failed, and Cody and his troopers killed her while Kenobi and Skywalker rescued Unduli and escaped the collapsing temple, along with Cody.[8]
Battle on Saleucami
When Jedi Council Member Eeth Koth was captured by General Grievous, Cody, with a squad of his troopers went with Kenobi aboard a light cruiser to distract Grievous while Skywalker, Adi Gallia, Captain Rex, and a small squad of troopers aboard a Jedi shuttle were to rescue Master Koth. Cody and Kenobi were successful in getting Grievous's attention. When Grievous's command ship locked on to Kenobi's ship, Cody and his troopers fought against Grievous's commando droids as they boarded the ship. After Grievous' and Kenobi's duel on the Kenobi's ship's bridge, Grievous fled back to his ship. Cody was able to fire a ascension cable at grievous and then he and his men grabbed Grievous, but Grievous overpowered them. Cody and two of his troopers followed Grievous and Kenobi into the docking tube. When Grievous' ship destroyed Kenobi's ship, Cody lost one of his troopers. Luckily, Master Gallia fired an ascension cable to them and Cody, one of his troopers and Kenobi were able to climb out of the docking tube. After Skywalker picked them up, Admiral Yularen told them that one of Grievous's landing ships attempted to land but crashed on Saleucami. Kenobi then decide to take Cody and Rex to find grievous.[16]
After Kenobi's forces landed on Saleucami, they all went to what remained of Grievous' landing ship. When they got there, Cody looked at the intake valves which were still warm, meaning that the crash didn't happen that long ago. Kenobi then decided to split up his forces with Rex searching the wetlands while Kenobi, Cody and Crys continued to investigate the crash site. When one of Cody's troopers found a droid, they took it into the AT-TE to look into while continuing their search on the go. Cody was to break the droid's access codes, while Crys was able to power up the droid's guidance system. With this information, they were able to find the other escape pods, hence picking up Grievous's scent. After that Cody and Kenobi found one of the escape pods, but grievous wasn't there, so they move on to the next one. When they found the last escape pod, grievous and his droids were there, waiting for a ship. Cody, Kenobi and their force fought Grievous, but once again Grievous escaped, leaving Cody and Kenobi back where they started.[17]
Defense of the Coronet
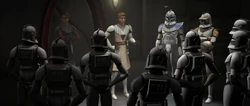
After Kenobi's investigation on Mandalore, Cody along with Anakin, Rex, and their troopers were assigned to escort the Duchess Satine aboard the Coronet to Coruscant.[8] Later in the Coronet's cargo hold, Obi-wan briefed their troopers on the importance of the safety of Duchess Satine. After Cody, Rex and their troopers then went on patrol in the cargo hold. When Cody and Rex lost contact with two of their troopers, Rex contacted Kenobi, informing him of the situation. When Skywalker came down there, Cody, Rex and him found a open container. Later when Skywalker was ambushed by an assassin probe Rex, Cody and one of their troopers finished it off. Unfortunately one of the probes made it to the lifts. Then the fallen assassin probe unleashed smaller probe killer. Cody and Rex then stayed close to Skywalker till they destroyed the last probe. After that Cody and Rex went with Skywalker to find the droid in charge of the cargo manifest. When Skywalker told Kenobi that one of the senators with Satine was a traitor, Skywalker returned to the cargo hold to help Cody and Rex find the last probe. When Cody and Rex found one of their trooper's helmets one of the smaller probe jumped at them. Fortunately, Skywalker and R2-D2 destroyed before it killed Cody and Rex. After Rex destroyed the last assassin probe, the traitor Senator Merrik took Satine hostage, and then called for assistance from Death Watch command, who sent three Separatist boarding craft to help him. When they latched on to the Coronet, they unloaded Super battle droids. Cody along with Skywalker, Rex, their troopers, and Satine's Bodyguards fought against them while Kenobi tried to rescue Satine. After Skywalker stopped and killed Senator Merrik, Cody reported to him that all the droids were destroyed.[18]
Rescuing Master Piell
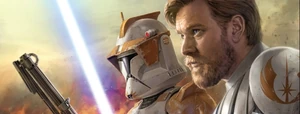
When Master Even Piell was captured, Cody attended Master Plo Koon's briefing at the Jedi Temple. Their mission: rescue Master Piell from the impregnable prison, the Citadel, before Piell is force to give up the information on the Nexus Routes. Cody and the rest of the team then went down to the temple's hangar. There Cody and the team were frozen in carbonite in order to avoid sensors. When Cody and the team got past Lola Sayu's blockade, they were thawed out by Artoo. When Cody, Kenobi, and Skywalker went to look at their way in, they saw that the jet packs and ascension cables were ruled out because of the wind and mines on the cliff's face. So Cody and the team had to free climb it. Unfortunately, one of the troopers, Charger fell onto one of the mines while climbing it, alerting the Citadel's warden Commander Osi Sobeck to their presence. Cody and the team make their way through the halls of the Citadel, but encountered booby traps which killed another of their troopers, Longshot. Cody and the team then found and saved Master Piell before the interrogator droid takes out his good eye. After Piell told the team that his Captain has the other half of the Nexus Route, Cody and the team then make their way down to where he is being held. Cody and the team then ran into commando droids. Cody and the team were able to deal with the first of the commando droids. Sobeck then activated magnets in the ceiling which took everyone's weapons and Skywalker arm from them. When Kenobi and Piell used the force to hold back the commando droids, cody, rex and their men took them head on,but to no avail. Fortunately, Skywalker was able to turn off the magnets and gave everyone their weapons. Cody and the team reached where Piell's Captain, Wilhuff Tarkin and the other officers were being held. Kenobi and Skywalker then decide, in order to protect the information, to split up with Rex, ARC Troopers Echo, Fives, Skywalker and Ahsoka taking Tarkin while Cody and Kenobi took Piell with them. As Kenobi's team escaped, Cody and one of his troopers planted explosives along the way. Kenobi then set them off and Cody and the team made their escape. During their escape they met up with Skywalker's team and Arc Trooper Echo, was killed. The ship they were going to escape in was also destroyed. Cody and team then contacted the jedi council, who sent master Plo Koon to rescue them at an island in the middle of a lava pit. On their way there Master Even Piell was killed during a firefight with droids. The rest of the survivors climbed aboard Master Plo's gunship and made it away safely.[19]
Battle of Umbara
When Umbara defected to the Separatists, Cody and his 212th Battalion went with Generals Kenobi, Skywalker Saesee Tiin, and Pong Krell to take Umbara's capital.[20] Cody and his battalion fought hard against the Umbaran militia to take the capital, despite the long range missiles[21] and Krell, who was secretly sabotaging their efforts. A result of these sabotages was the death of Cody's longtime comrade Waxer. Despite these setbacks, Cody, Kenobi, and the 212th were able take the capital.[22]
Battle of Kiros
After the Separatists occupied the Togruta colony world of Kiros, Cody went with Generals Kenobi, Skywalker, Commander Ahsoka and Captain Rex to liberate that world. After Kenobi and Skywalker's BARC speeders made their way to the separatist headquarters in the Governor's tower, Cody brought up the AT-TEs and the AT-RTs to surround the Headquarters. Cody's men were in charge of finding and destroying the rest of the droids, particularly Cody's best man Boil. Cody then got a message from the Zygerrian Separatist Commander, Darts D'Nar, who wanted to negotiate terms of surrender. After Skywalker took the message from Cody and destroyed it in frustration, Cody and Skywalker waited for Kenobi to negotiate D'nar's surrender. D'nar then set off a bomb, which wounded a couple of his troopers. Commander Cody then continued to hold his position as Skywalker and Ahsoka disable bombs around the city. Though they liberated the world, disable the bombs and captured D'nar along with his ship, the Togrutas were taken into slavery by the Zygerrians.[23]
Facing Grievous aboard Negotiator
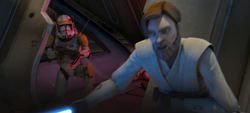
Later on Cody accompanied Kenobi aboard the Venator-class Negotiator. Cody was about to rescue Ahsoka, who was taken captive by pirate gang leader Hondo Ohnaka while she was with six Jedi Initiates back from a mission on planet Ilum, aboard the Crucible. However, the rescue plan failed, as Grievous and his forces launched an all-out attack on Kenobi's fleet. Cody went to the hangar of the destroyer, where Grievous's ship landed, and tried to take up the fight with the Separatist forces. They however had to retreat, and watch in horror as Grievous killed the remaining troopers one by one. He and Kenobi managed to injure Grievous lightly, and escape. As the ship could not be saved, he and Kenobi activated the ship's self-destruct mechanism, and along with the remaining clone forces escaped in escape pods. Grievous finally managed to leave the doomed star destroyer.
Other battles
Come on, boss, when have I ever let you down?"
"Well, there was Cato Neimoidia.CC-2224 and Obi-Wan Kenobi refer to a battle on Cato Neimoidia
The following months took Cody to dozens of worlds—Rendili, Kooriva, Cato Neimoidia, Maramere, Boz Pity and Sarrish, just to name a few—as the fighting intensified. Cody and Kenobi developed as close a relationship as was allowed after months of fighting side-by-side.[25]
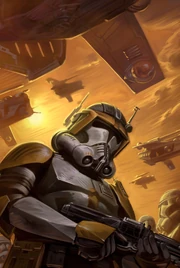
In an effort to bring the war to an early conclusion, the Republic launched an assault on Cato Neimoidia, home to Trade Federation Viceroy Nute Gunray's redoubt. As the battle to capture Viceroy Gunray's majestic redoubt raged, Cody's Squad Seven, led by Jedi Generals Obi-Wan Kenobi and Anakin Skywalker, managed to penetrate the Separatists' inner-defenses and fought its way into the complex. While they were unable to capture the Viceroy himself, they were able to capture vital intelligence. In his hurry to evacuate the redoubt, Gunray left behind his mechno-chair, from the which the Republic was able to learn of the coming Separatist attack on the planet Belderone.
In what was publicly announced as an effort to bring a swift end to the war, Supreme Chancellor Palpatine committed an additional 200,000 troopers to the Outer Rim Sieges. Commander Cody's 7th Sky Corps was among the thousands of divisions reassigned to the battles raging in the Rim.
Battle of Utapau
Would it have been too much to ask for the order to have come through before I gave him back the bloody lightsaber?Cody's thoughts after receiving Order 66
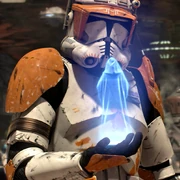
Cody fought in the Battle of Coruscant,[7] which ended with his general and Skywalker rescuing Chancellor Palpatine from General Grievous. A short time later, when Kenobi was sent to investigate a Separatist presence on Utapau, he instructed Commander Cody and his 212th Attack Battalion to follow shortly after him. As it turned out, Utapau was acting as a temporary safe haven for the Separatist Council, with General Grievous and his droid armies acting as their protectors. During the Battle of Utapau, Commander Cody led his team of men into Pau City, along with Parjai Squad and various other paratrooping squads. During the attack, Kenobi dropped his lightsaber, which hit the ground in front of him, and he would later return it to the General.[4]
As Obi-Wan engaged Grievous in a fierce lightsaber duel, Cody battled the droid forces. It was during the fighting that he received Order 66 via an encrypted channel from the Supreme Chancellor, who was secretly the Sith Lord Darth Sidious. Despite being comrades-in-arms with Kenobi, Cody's loyalty to the Republic overrode his loyalty to Kenobi. In response, Cody ordered one of his AT-TEs to fire at Kenobi and his varactyl mount, Boga, causing the two to plummet to the bottom of the sinkhole.
Cody, all too aware of Jedi prowess, was not convinced of Kenobi's death, and sent Arakyd Prowler 1000 probe droids into the catacombs beneath Pau City to look for him. After following through with Palpatine's orders, he rallied his troops, and within the hour the Separatists were routed and Pau City was under Republic control. Cody's fears were confirmed when he was informed by a lieutenant that General Grievous's personal starfighter had fled the planet. Cody readied his troops to pursue the Separatist Council, which in the confusion of battle had managed to slip away.
Post-Clone Wars
Imperial Career
Since the Empire has redirected the clone trooper program to other pursuits and stepped up recruiting inferior humans from the Outer Rim, the operational effectiveness of this army has declined significantly.Commander Cody
Soon after Order 66, Palpatine's rise to power was completed with his ascension as Emperor of the first Galactic Empire.[4] As a result of the Grand Army's reorganization into the Stormtrooper Corps,[27] Commander Cody and the remaining clone troopers who survived the Clone Wars composed the first generation of Imperial stormtroopers. Ultimately, Cody remained in service to the New Order for years.[4] In that time, he witnessed the rise in recruitment of birth-born Humans as enlisted troopers, which in turn led to the decline and marginalization of the original Jango Fett clones.[6]
By the year 1 BBY,[28] Commander Cody was in charge of an Imperial Battalion that was stationed in Timira City, one of the cloning facilities located on his homeworld of Kamino. In addition to providing security to the facility, he regularly tested his soldiers with drill exercises, only to be profoundly disappointed by the enlisted troopers under his command.[6] Likewise, the men were not particularly fond of the Commander's leadership style. One recruit expressed his disdain—a sentiment shared by his comrades—for patrol duty. To the troopers, patrolling Timira City was not only unnecessary due to Kamino's heavily fortified condition; it was extremely aggravating because of the seemingly endless rain and thunderstorms. In sum, the inhospitable climate conditions of Kamino[29] and Cody's bitter attitude[6] produced a significantly low troop morale among the men.[29]
Around the same time, the Imperials failed to prevent one of Darth Vader's test subjects—a rogue clone of the original Starkiller—from escaping Kamino in the Dark Lord's own TIE fighter. The clone later returned at the head of the Alliance Fleet, hence resulting in the Assault on Kamino. The Imperial garrison in Timira City was ultimately wiped out and Vader himself was captured by the Rebel Alliance, thus marking the Rebellion's first major victory in the Galactic Civil War, and leaving Cody's fate ambiguous.[26]
Reminiscing
At some point after the Clone Wars, Cody, now wearing his Phase I clone trooper armor once again, recalled that things had been different during the conflict. He remembered his clone brothers', and the Jedi's service during the conflict and recalled that he fought on a number of worlds.[7] Though he had turned against the Jedi Order during Order 66,[4] the clone trooper recalled that he had learned much from Kenobi, Skywalker, and Ahsoka Tano. In fact, in addition to remembering that they had fought together against everything the Confederacy used against them, he now thought the three Jedi and him had been heroes.[7]
Personality and traits
Just today I witnessed a new recruit hit his head on a blast door during maneuvers. Blasted idiots! What a disgrace to the heritage and legacy of a once truly incredible fighting force.Commander Cody
A loyal and no-nonsense commander, Cody shared easy camaraderie with General Kenobi. His battlefield exploits and good leadership skills had earned him respect of both clones and Jedi alike.[30]
Cody was a cautious trooper and a brilliant strategist, leading the 212th to victory after victory. He was often teamed up with Captain Rex and enjoyed a friendship with him. Cody possessed excellent close combat skills, often incorporating body slams, kicks and punches against his enemies besides using his blaster. Cody was also well versed in hand-to-hand fighting, and was able to knock out Slick with a single punch.[11]
Cody was extremely proficient with blasters. His preference for a standard blaster over dual DC-17 hand blasters allowed him to make precision shots at longer ranges. Cody had received additional training as a commander, and was capable of headshotting enemies without steadying his blaster with his second hand. He was also able to shoot a barrel which Obi-Wan Kenobi had thrown at high speeds, and take down multiple droids a considerable distance away with rapid, well-placed shots. Cody also shot the blaster out of another person's hand before he could react, showing excellent reflexes and coordination.
Cody displayed a dislike for standard Commander gear such as kamas and chest pauldrons, instead choosing to incorporate various unorthodox gear such as a jetpack, laser sight, and vibroknife on his armor.
While Cody had developed a sense of respect for those who considered him as a friend, like most other clones, his thoroughly ingrained loyalty to the Republic was the dominating trait of his character.
Later in his life, Cody became cynical and bitter because of the changes that were introduced by the New Order, specifically the alterations to the Imperial Military. Though a proud veteran of the Clone Wars, Cody felt nothing except contempt for the Stormtrooper Corps. As one of the last remaining clones of Jango Fett, he felt isolated and alone in his hatred for the birth-born human recruits who came to dominate the ranks of a military that was once the exclusive province of Fett's progeny. From Cody's point of view, enlisted personnel were inferior soldiers compared to the original clone troopers. He regarded the former Grand Army of the Republic as a once truly incredible fighting force, and so he resented the reforms which he believed to be responsible for a significant decrease in the combat effectiveness of the Grand Army's Imperial successor.[6]
Thus he developed a sense of nostalgia for his past as a commander of clone troopers; enlisted stormtroopers were nothing other than expendable resources to him. Furthermore, Cody also felt that his low regard for birth-born troopers would have been shared by his genetic template, Jango Fett, had he still been alive. Ultimately, Cody was convinced that Fett would have killed the enlisted troops if he had lived to see what had become of his legacy.[6]
When Sidious issued Order 66 and labelled Kenobi a traitor to the Republic, Cody's indoctrination overcame nearly all his loyalty to the Jedi and as a result, Cody turned on his long time comrade and superior Obi-Wan.[4] Sometime after the Clone Wars, however, Cody recorded himself in his old armor, showing regret for betraying the Jedi and stating that Anakin, Obi-Wan, and Ahsoka in particular had truly been heroes.[7]
Equipment
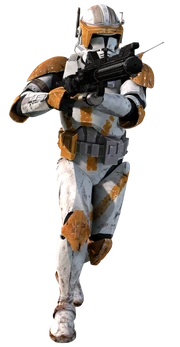
After his additional training, Cody customized his armor, and wore several different versions. Early in the Clone Wars, he used a set of Phase I clone trooper armor that featured a visor, antennas, a small flood light, and orange stripes. Later, Cody was known to have worn at least two similar sets of Phase II armor. One featured two antennae coming from each of his oversized shoulder pads. With this set of armor, Cody also wore a holster on his belt that carried a small blaster pistol and a large jetpack. This set of armor also had orange stripes.
Cody's other set of Phase II armor had a slightly different orange striped paint job, as well as two gray stripes coming down the sides of the top of his helmet. This set of armor also had a small tool attached to the upper arm piece, only one antenna on the shoulder pads with one on the back of his helmet, and a smaller, oval shaped jetpack. Also, Cody has Imperial-like rank markings adorning the left side of his breast-plate, which signify his rank of clone marshal commander. Cody is best known for his usage of the DC-15A instead of dual pistols.
Behind the scenes
Commander Cody, along with every other clone, was played by Temuera Morrison—the same actor who played Jango Fett—in Revenge of the Sith, Andrew Chaikin in the Revenge of the Sith video game, André Sogliuzzo in the Star Wars: Clone Wars cartoon, and Dee Bradley Baker in Star Wars: The Clone Wars.
Cody's name is a tribute to the film serial character Commando Cody, also known as the Rocket Man, hence his jetpack.[31]
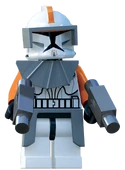
In LEGO Star Wars: The Video Game, Cody assists Obi-Wan Kenobi in confronting Grievous. In the end, Cody's blaster is knocked out of his hand by Grievous, who subsequently kills Cody. Kenobi uses the fallen trooper's blaster to kill the General, though in the movie, Cody was nowhere near Grievous and Obi-Wan's battle, as he was leading the troops in the battle and Obi-Wan killed Grievous with his own blaster. Cody's appearance in the game is also used for all the other clone commanders that appear in the game. His minifigure in the game is a LEGO Star Corps Trooper.
In The Clone Wars first season episode "The Hidden Enemy," Cody is mistakenly referred to as a captain by Kenobi, due to a script change in which Kenobi was originally talking to Captain Rex.[32]
Appearances
- Star Wars: Battle for the Republic
- SkyeWalkers: A Clone Wars Story
- Republic 69 (Mentioned only)
-
 Star Wars: The Clone Wars — "Cat and Mouse"
 - The Clone Wars: Shadowed
-
 Star Wars: The Clone Wars — "The Hidden Enemy"
 - Star Wars: The Clone Wars film
- Star Wars: The Clone Wars novelization (and audiobook)
- The Clone Wars: The New Padawan
-
 Star Wars: The Clone Wars — "Ambush" (In flashback(s))
 -
 Star Wars: The Clone Wars — "Rising Malevolence" (DVD extended version)
 - The Clone Wars: Mouse Hunt
-
 Star Wars: The Clone Wars — "Rookies"
 -
 Star Wars: Clone Wars Adventures — "Republic Defender"
 -
 Star Wars: Clone Wars Adventures — "War Room"
 - The Clone Wars: Crash Course (Appears in hologram)
-
 Star Wars: The Clone Wars — "Innocents of Ryloth"
 -
 Star Wars: The Clone Wars — "Liberty on Ryloth" (In flashback(s))
 - Star Wars: The Clone Wars: Republic Heroes
- "The Droid Deception" — Star Wars: The Clone Wars Comic 6.4
-
 Star Wars: The Clone Wars — "Holocron Heist"
 -
 Star Wars: The Clone Wars — "Children of the Force"
 - The Clone Wars: The Valsedian Operation
-
 Star Wars: The Clone Wars — "Landing at Point Rain"
 -
 Star Wars: The Clone Wars — "Legacy of Terror"
 -
 Star Wars: The Clone Wars — "Grievous Intrigue"
 -
 Star Wars: The Clone Wars — "The Deserter"
 -
 Star Wars: The Clone Wars — "The Mandalore Plot"
 -
 Star Wars: The Clone Wars — "Voyage of Temptation"
 - "In the Air" — Star Wars: The Clone Wars Comic 6.14
-
 Star Wars: The Clone Wars — "ARC Troopers"
 - The Clone Wars: Hunting the Hunters (Part III) (Voice only)
-
 Star Wars: The Clone Wars — "Hunt for Ziro"
 -
 Star Wars: The Clone Wars — "Senate Murders" (In flashback(s))
 - The Clone Wars: Decide Your Destiny: The Lost Legion
- "Outgunned" — Star Wars: The Clone Wars Comic 6.20
-
 Star Wars: The Clone Wars — "The Citadel"
 -
 Star Wars: The Clone Wars — "Counterattack"
 -
 Star Wars: The Clone Wars — "Citadel Rescue"
 -
 Star Wars: The Clone Wars — "Darkness on Umbara"
 - The Clone Wars 1 (Indirect mention only)
-
 Star Wars: The Clone Wars — "Kidnapped"
 - The Clone Wars 6 (Retcon)
- The Clone Wars: The Sith Hunters
- Darth Maul—Death Sentence 3
- Darth Maul—Death Sentence 4
- "Mask of Iron" — Star Wars: The Clone Wars Comic 6.44 (Mentioned only)
- "Lockdown" — Star Wars: The Clone Wars Comic 6.47
- "The Runaway Ride" — Star Wars: The Clone Wars Comic 6.50
- "Deadly Allies" — Star Wars: The Clone Wars Comic 6.51
- "Routine Valor" — Free Comic Book Day 2006 Special
-
 Star Wars: The Clone Wars — "Bound for Rescue"
 -
 Star Wars: The Clone Wars — "Secret Weapons" (In flashback(s))
 -
 Star Wars: The Clone Wars — "Point of No Return"
 -
 Star Wars: Clone Wars — "Chapter 22" (First appearance)
 - Reversal of Fortune (Appears in hologram)
- Republic 77
- Order 66: A Republic Commando Novel (Mentioned only)
- Labyrinth of Evil
- Star Wars: Episode III Revenge of the Sith
- Star Wars: Revenge of the Sith novelization (and unabridged audiobook)
- Star Wars: Episode III Revenge of the Sith junior novelization (Mentioned only)
- Star Wars: Episode III Revenge of the Sith video game
- ° Star Wars: Episode III — Revenge of the Sith
- Star Wars: The Force Unleashed II (Mentioned only)
- Star Wars Battlefront: Renegade Squadron (Non-canonical appearance)
- Star Wars Galaxies (post-NGE) (Picture only)
Non-canon appearances
- LEGO Star Wars: The Video Game
- LEGO Star Wars II: The Original Trilogy (Previous save game from the original game required)
- LEGO Star Wars: The Complete Saga
-
"Kowakian Monkey-Lizard" on LEGO's official website (original article) (content now obsolete; backup link)
-
"Orders are orders" on LEGO's official website (original article) (content obsolete and backup link not available)
-
"Sith make the best pancakes" on LEGO's official website (original article) (content now obsolete; backup link)
- LEGO Star Wars III: The Clone Wars
- LEGO Star Wars: The Padawan Menace
Sources
- Star Wars Insider 73
- Star Wars: Episode III Revenge of the Sith Illustrated Screenplay
- Star Wars: Revenge of the Sith Scrapbook
- Star Wars: Revenge of the Sith: The Visual Dictionary
- Star Wars: Episode III Revenge of the Sith: Prima Official Game Guide
-
 Sith Snapshots: Clone Commander 2224 on StarWars.com (content now obsolete; backup link)
 -
 "Guide to the Grand Army of the Republic" — Star Wars Insider 84
 - The New Essential Chronology
- Star Wars Chronicles: The Prequels
- Dressing a Galaxy: The Costumes of Star Wars
-
 Star Wars: The Best of 2005 - Clone Mania on StarWars.com (content now obsolete; backup link)
![]() Star Wars Miniatures — Champions of the Force
Star Wars Miniatures — Champions of the Force
- Star Wars: The Complete Visual Dictionary
-
 Star Wars: The Saga Collection (Pack: Clone Commander Cody) (backup link)
 -
 Star Wars: 30th Anniversary Collection (Commemorative Tin Collection: Star Wars: Episode III - Revenge of the Sith (Exclusive Edition) (Clone Commander Cody, Anakin Skywalker, General Grievous. Clone Pilot)) (backup link)
 -
Militaries of Star Wars (Pack: Republic Clone Trooper (212th Attack Battalion Utapau)) (backup link)
- Threats of the Galaxy
- Star Wars: The Clone Wars: The Visual Guide
-
 The Clone Wars Episode Guide: Rookies on StarWars.com (content now obsolete; backup link)
 - The Complete Star Wars Encyclopedia
-
 Gentle Giant Mini Busts (Pack: Airborne Trooper) (backup link)
 -
 Star Wars: The Clone Wars (Pack: Clone Commander Cody) (backup link)
 -
 Star Wars: The Clone Wars (Pack: Clone Trooper (212th Attack Battalion)) (backup link)
 - Star Wars: The Official Starships & Vehicles Collection 9
- The Clone Wars Campaign Guide
-
 The Clone Wars Episode Guide: The Hidden Enemy on StarWars.com (content now obsolete; backup link)
 -
 The Clone Wars Episode Guide: Innocents of Ryloth on StarWars.com (content now obsolete; backup link)
 - The Art of Star Wars: The Clone Wars
- Star Wars: The Clone Wars: Visual Guide Ultimate Battles
- The Essential Atlas (Picture only)
-
 "Obi-Wan Kenobi: Wizard of the Desert" — Star Wars Insider 112 (also reprinted in Special Edition 2013)
 -
 The Clone Wars Episode Guide: Holocron Heist on StarWars.com (content now obsolete; backup link)
 -
 The Clone Wars Episode Guide: Children of the Force on StarWars.com (content now obsolete; backup link)
 - Star Wars: The Clone Wars – The Official Episode Guide: Season 1
- Star Wars: The Official Starships & Vehicles Collection 32
-
 Star Wars: The Clone Wars (Pack: 212th Attack Battalion Clone Troopers And Jet Backpacks) (backup link)
 -
 Star Wars: The Clone Wars (Pack: BARC Speeder Bike with Clone Commander Cody) (backup link)
 -
 Star Wars: The Vintage Collection (Pack: Clone Commander Cody) (backup link)
 -
 "Ask Lobot" — Star Wars Insider 121
 - Star Wars: The Force Unleashed II (PS3/Xbox 360 databank)
- Star Wars: Mysteries of the Jedi
-
 The Clone Wars Episode Guide: Citadel Rescue on StarWars.com (content now obsolete; backup link)
 - Star Wars: Head-to-Head Tag Teams
-
 The Clone Wars Season 4 Trailer on StarWars.com (backup link)
 - Star Wars: The Clone Wars Comic 6.24
-
 Cato Neimoidia in the Databank (content now obsolete; backup link)
 -
 Cody, Clone Commander in the Databank (content now obsolete; backup link)
 - Star Wars: The Clone Wars The Complete Season Three
-
 Star Wars: Clone Wars Adventures — "Shop" (Set: Commander Cody Phase II)
 - Book of Sith: Secrets from the Dark Side
- The Essential Guide to Warfare
- Star Wars: The Ultimate Visual Guide: Updated and Expanded
- The Clone Wars: Masters of the Force (Picture only)
- Star Wars: The Legendary Yoda (Picture only)
- The Official Star Wars Fact File Part 2 (2013) (COD 1-4: Commander Cody)
-
 Star Wars: Force Collection (Card: Clone Commander Cody (L))
 -
 Star Wars: Force Collection (Card: Clone Commander Cody (D))
 - Star Wars: Sith Wars
-
 Star Wars: The Clone Wars (Pack: Clone Commander Cody) (backup link)
 -
Militaries of Star Wars (Pack: 212th Attack Battalion: Utapau (2nd Airborne Company)) (backup link)
-
 "Meet the Imperials!" — Star Wars Magazine 1
 -
 "The Great Jedi Purge!" — Star Wars Magazine 1
 -
 Boga in the Encyclopedia (content now obsolete; backup link)
 -
 Clone Commander Cody in the Encyclopedia (content now obsolete; backup link)
 - The Official Star Wars Fact File Part 57 (COD 5-6: Commander Cody)
Non-canon sources
- LEGO Star Wars: The Video Game: Prima Official Game Guide
- LEGO Star Wars: The Complete Saga: Prima Official Game Guide
Notes and references
- ↑ 1.0 1.1 1.2 1.3 1.4
 Clone Commander Cody in the Encyclopedia (content now obsolete; backup link)
- ↑
 clone troopers in the Databank (content now obsolete; backup link)
- ↑ 3.0 3.1 3.2 3.3 Star Wars: Head-to-Head Tag Teams
- ↑ 4.0 4.1 4.2 4.3 4.4 4.5 4.6 4.7 4.8 Star Wars: Episode III Revenge of the Sith
- ↑
 Star Wars: Clone Wars — "Chapter 22"
- ↑ 6.0 6.1 6.2 6.3 6.4 6.5 6.6 Star Wars: The Force Unleashed II, PS3/Xbox 360 Stormtrooper Databank entry
- ↑ 7.0 7.1 7.2 7.3 7.4 7.5 7.6
Star Wars: TCW TV spot Cody on the Willhemine YouTube channel (backup link)
- ↑ 8.00 8.01 8.02 8.03 8.04 8.05 8.06 8.07 8.08 8.09 8.10 8.11 The Official Star Wars Fact File Part 2 (2013) (COD 1-4: Commander Cody)
- ↑
 Star Wars: The Clone Wars — "Landing at Point Rain"
- ↑ Star Wars: The Clone Wars film
- ↑ 11.0 11.1
 Star Wars: The Clone Wars — "The Hidden Enemy"
- ↑ 12.0 12.1 12.2
 Star Wars: The Clone Wars — "Rookies"
- ↑ 13.0 13.1
 Star Wars: The Clone Wars — "ARC Troopers"
- ↑
 Star Wars: The Clone Wars — "Innocents of Ryloth"
- ↑
 Star Wars: The Clone Wars — "Holocron Heist"
- ↑
 Star Wars: The Clone Wars — "Grievous Intrigue"
- ↑
 Star Wars: The Clone Wars — "The Deserter"
- ↑
 Star Wars: The Clone Wars — "Voyage of Temptation"
- ↑
 Star Wars: The Clone Wars — "The Citadel"
- ↑
 Star Wars: The Clone Wars — "Darkness on Umbara"
- ↑
 Star Wars: The Clone Wars — "Plan of Dissent"
- ↑
 Star Wars: The Clone Wars — "Carnage of Krell"
- ↑
 Star Wars: The Clone Wars — "Kidnapped"
- ↑ 24.0 24.1 Star Wars: Episode III Revenge of the Sith novelization
- ↑
 Cody, Clone Commander in the Databank (content now obsolete; backup link)
- ↑ 26.0 26.1 26.2 Star Wars: The Force Unleashed II
- ↑ Star Wars: The Official Starships & Vehicles Collection 32
- ↑ Star Wars: The Force Unleashed II graphic novel
- ↑ 29.0 29.1 Star Wars: The Force Unleashed II, PS3/Xbox 360 Timira City Databank entry
- ↑ Star Wars: The Clone Wars: Republic Heroes
- ↑ Star Wars: Clone Wars Volume Two DVD (Audio Commentary)
- ↑
 The Clone Wars Episode Guide: The Hidden Enemy on StarWars.com (content now obsolete; backup link)
